All posts by isobel

polar bear polar bear what do you hear pdf

Article Title: Exploring the World of “Polar Bear, Polar Bear, What Do You Hear?”

The PDF version of “Polar Bear, Polar Bear, What Do You Hear?” is widely available online, offering a convenient way to access the beloved story. Flipbooks and downloadable files allow readers to enjoy the rhythmic tale and vibrant illustrations by Eric Carle digitally. Many platforms provide free access, making it easily shareable for educational and storytelling purposes.

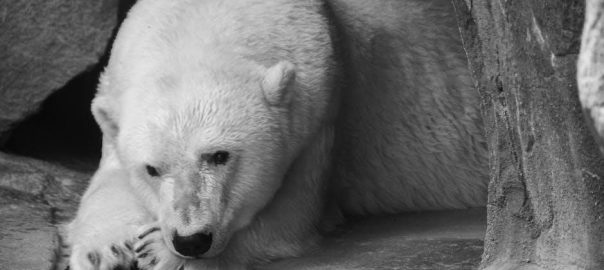
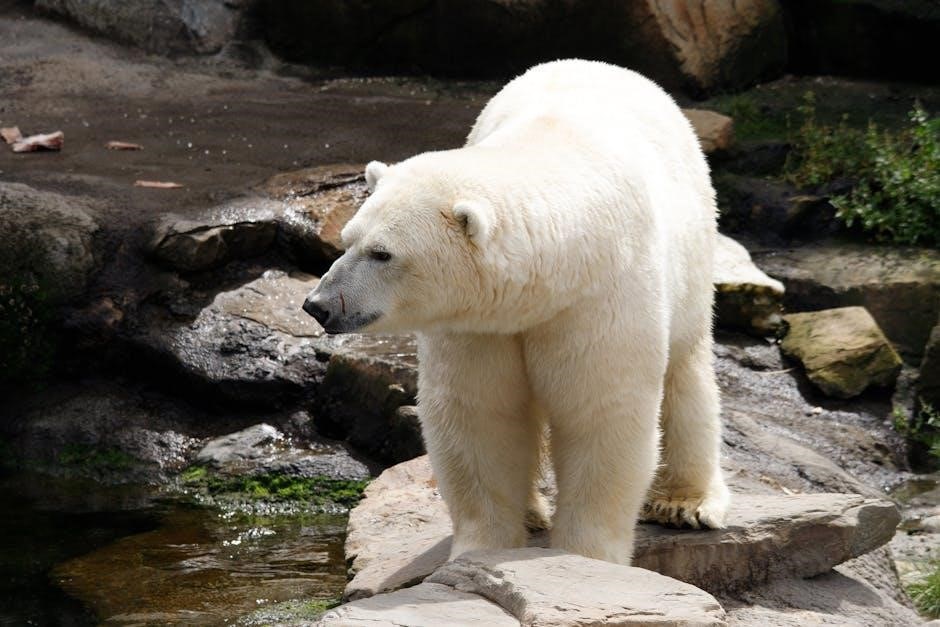
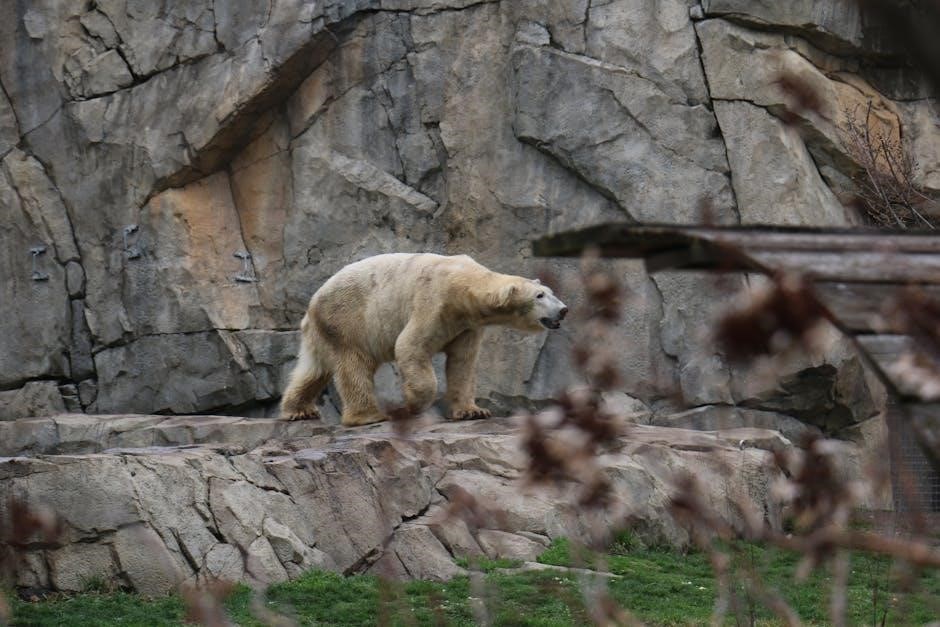
Polar Bear, Polar Bear, What Do You Hear? is a captivating children’s book written by Bill Martin Jr. and illustrated by Eric Carle. First published in 1991, this charming story has become a beloved classic in children’s literature. The book follows a parade of zoo animals, starting with a majestic polar bear, as they respond to the zookeeper’s question, “What do you hear?” Each animal introduces itself with a unique sound, creating a symphony of noises that engage young readers. The rhythmic text and repetitive structure make it easy for children to follow and participate, while Eric Carle’s vibrant collage illustrations bring the animals to life. The story not only introduces children to various zoo animals but also encourages them to mimic the sounds, fostering interactive learning and creativity. With its timeless appeal, this book has become a staple in classrooms and homes, offering a fun and educational experience for preschoolers.

Authors and Illustrators: Bill Martin Jr. and Eric Carle

Bill Martin Jr. and Eric Carle are two of the most renowned names in children’s literature, and their collaboration on Polar Bear, Polar Bear, What Do You Hear? showcases their exceptional talents. Bill Martin Jr., a celebrated author and educator, crafted the rhythmic and repetitive text that makes the book engaging and easy for young readers to follow. His use of simple, rhythmic language encourages children to participate by chanting along, making the story interactive and fun. Eric Carle, a prolific illustrator, brought the story to life with his signature collage-style artwork, creating vibrant and recognizable animal characters that captivate children’s imaginations. Together, they have created a timeless tale that combines education with entertainment, making it a beloved choice for both parents and educators. Their partnership has left a lasting impact on children’s literature, blending art and storytelling in a way that resonates with young readers worldwide.

Key Themes: Animal Sounds and Interactive Learning

Polar Bear, Polar Bear, What Do You Hear? revolves around two central themes: the exploration of animal sounds and the promotion of interactive learning. The story introduces a variety of zoo animals, each with distinct vocalizations, encouraging children to mimic and explore the sounds. This repetitive and rhythmic structure makes it easy for young readers to engage actively, fostering phonological awareness and memory skills. The book’s interactive nature invites children to participate by chanting the words and imitating the animals, turning storytelling into a dynamic experience. This approach not only enhances language development but also sparks curiosity and creativity. By incorporating a parade of animals, from the polar bear’s growl to the lion’s roar, the story teaches children about the diversity of the animal kingdom while making learning fun and accessible. The combination of sound exploration and interactive elements creates a captivating and educational experience for preschoolers.

Educational Value for Preschool Children

Polar Bear, Polar Bear, What Do You Hear? is a treasure trove of educational benefits for preschool children. The book’s repetitive structure and rhythmic text help young learners develop phonological awareness and memory skills. By chanting the words and mimicking animal sounds, children enhance their language development and creativity. The story’s interactive nature encourages active participation, turning reading into a dynamic and engaging experience. The introduction of various zoo animals and their distinct vocalizations fosters an early understanding of the natural world and its diversity. Additionally, the book’s simple yet captivating narrative supports literacy skills and prepares children for more complex storytelling. The combination of education and entertainment makes it an invaluable resource for both parents and educators, promoting a love for reading and learning in young minds. This book is not just a story—it’s a tool for early childhood development, blending fun with foundational skills.

The Collaboration Between Bill Martin Jr. and Eric Carle

The collaboration between Bill Martin Jr. and Eric Carle in Polar Bear, Polar Bear, What Do You Hear? is a testament to the magic that happens when two creative minds come together. Martin Jr.’s rhythmic and repetitive text perfectly complements Carle’s vibrant collage illustrations, creating a harmonious balance that captivates young readers. Their partnership began with a shared vision to create engaging, educational, and visually stunning books for children. Carle’s iconic hand-painted tissue paper collages bring the story to life, while Martin Jr.’s playful rhymes make the narrative irresistible to chant aloud. This collaboration not only resulted in a beloved children’s classic but also set a new standard for picture books, blending art, rhythm, and storytelling in a way that has endured for decades. Their teamwork reflects a deep understanding of how children learn and engage with stories, making their collaboration a cornerstone of modern children’s literature. Together, they crafted a book that is both entertaining and enriching, leaving a lasting legacy in the world of early childhood education.

The Role of Rhyme and Rhythm in the Story

The rhythmic and rhyming text in Polar Bear, Polar Bear, What Do You Hear? plays a pivotal role in engaging young readers and fostering a love for storytelling. Bill Martin Jr.’s use of repetitive phrases and a consistent beat creates a musical quality that encourages children to chant along, making the story interactive and memorable. The rhyme scheme simplifies language, aiding in phonological awareness and early literacy skills. Each animal’s unique sound adds to the rhythm, transforming the book into a participatory experience where children can mimic the noises, enhancing their auditory and motor skills. This rhythmic structure not only entertains but also educates, teaching children about animals and their sounds in a playful manner. The interplay of rhyme and rhythm ensures the story is both enjoyable and enriching, making it a timeless favorite for reading aloud. This element is crucial in capturing young imaginations and fostering a connection with the natural world through sound and repetition.

“Polar Bear, Polar Bear, What Do You Hear?” as Part of a Series

Polar Bear, Polar Bear, What Do You Hear? is part of a beloved series by Bill Martin Jr. and Eric Carle, including Brown Bear, Brown Bear, What Do You See?, Panda Bear, Panda Bear, What Do You See?, and Baby Bear, Baby Bear, What Do You See?. Each book follows a similar rhythmic and rhyming structure, making them instantly recognizable and engaging for young readers. The series introduces children to a variety of animals, their sounds, and habitats, while promoting phonological awareness and early literacy skills. The repetitive format encourages participation, with children eagerly anticipating and mimicking the animals’ calls. Over the years, the series has grown in popularity, with each title building on the success of the previous ones. The collaboration between Martin and Carle has resulted in a collection of books that are both educational and entertaining, making the series a staple in many classrooms and home libraries. The consistent use of vibrant illustrations and rhythmic text ensures a cohesive and immersive reading experience across all titles. This series has become a timeless favorite, with its enduring appeal continuing to captivate young readers and educators alike.

Availability of the Book in PDF Format

The PDF version of Polar Bear, Polar Bear, What Do You Hear? is widely available online, making it accessible for readers worldwide. Many websites offer free downloads of the book in PDF format, allowing parents, educators, and children to enjoy the story digitally. Platforms like Flip PDFs and educational repositories provide easy access to the file, often with additional features such as audio narration to enhance the reading experience. Some versions include interactive elements, enabling children to engage with the story and its animal sounds in a dynamic way. The PDF format also makes it simple to share the book for classroom use or storytelling sessions. While free downloads are common, purchasing the PDF from official retailers ensures support for the authors and publishers. The digital version retains the vibrant illustrations and rhythmic text that make the book a classic, ensuring that the magic of the story is preserved for a new generation of readers.

Benefits of Reading the Book Aloud

Reading Polar Bear, Polar Bear, What Do You Hear? aloud offers numerous benefits for young readers. The rhythmic text and repetitive phrases encourage children to join in, fostering phonological awareness and early literacy skills. The interactive nature of the story, with its animal sounds, sparks creativity and curiosity, as children mimic the sounds and engage with the narrative. Reading aloud also enhances vocabulary and comprehension, as kids learn to associate words with meanings and actions. Additionally, the shared experience of reading together strengthens bonding between parents, educators, and children. The PDF version of the book, with its audio narration option, further enriches the reading experience, allowing children to hear proper pronunciation and rhythm. This collaborative and immersive approach makes the story a powerful tool for early learning and enjoyment, helping children develop a lifelong love for reading and storytelling.

Interactive Elements: Encouraging Children to Participate

The interactive elements in Polar Bear, Polar Bear, What Do You Hear? are designed to engage children actively, making the reading experience immersive and fun. The repetitive structure of the story, with its rhythmic phrases like “Polar bear, polar bear, what do you hear?” invites children to predict and chant along. This call-and-response format encourages participation, as young readers eagerly anticipate and mimic the animal sounds. The book’s simplicity and repetition make it easy for children to join in, fostering a sense of confidence and early literacy skills. Additionally, the story’s focus on animal noises prompts children to imitate the sounds, turning reading into a playful activity. The final page, where the zookeeper asks the children to make their own sounds, further extends the interactive experience. These elements create a dynamic and engaging environment, encouraging children to become active participants in the storytelling process rather than passive listeners.

The Animal Parade: A Zoo Adventure

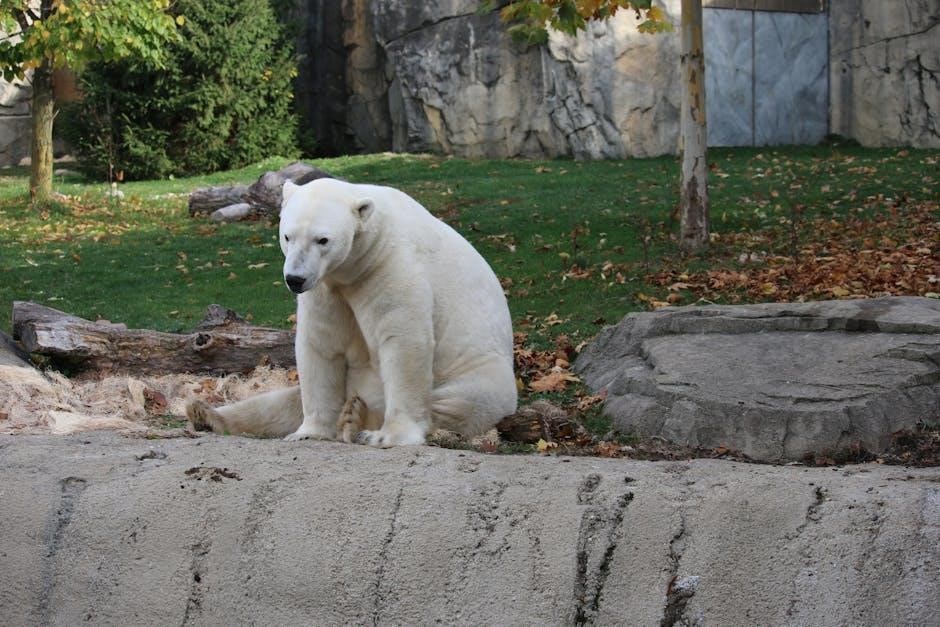
Polar Bear, Polar Bear, What Do You Hear? takes readers on a lively zoo adventure, featuring a colorful parade of animals. Each page introduces a new creature, from the majestic polar bear to the roaring lion, the snorting hippopotamus, and the trumpeting elephant. The story’s rhythmic flow and repetitive structure create a sense of anticipation, encouraging children to guess which animal will appear next. The animals’ distinct sounds and movements are highlighted, making the zoo come alive for young readers. Eric Carle’s vibrant collage illustrations further enhance the visual journey, capturing the unique characteristics of each animal. This engaging format not only entertains but also educates children about different zoo animals and their behaviors.

The zookeeper’s final question to the children adds a playful twist, inviting them to join the animal parade by making their own sounds. This interactive ending reinforces the idea that every child can be part of the adventure, turning the story into a shared experience.

Printable Resources and Activities for Teachers

Teachers and educators can enhance the learning experience with printable resources and activities designed to accompany Polar Bear, Polar Bear, What Do You Hear?. These materials include crafts, worksheets, and interactive exercises that align with the book’s themes of animal sounds and zoo adventures. For example, children can create animal masks or match animals with their corresponding sounds, fostering both creativity and understanding. Additionally, literacy units and lesson plans are available, providing structured ways to integrate the story into classroom curricula. Many of these resources are available in PDF format, making them easy to download and print. These activities not only reinforce the story’s educational value but also encourage active participation and engagement among students. By incorporating these resources, teachers can extend the book’s impact and help children develop essential skills in a fun and interactive way;

These resources are widely accessible online, offering teachers a convenient way to supplement their lessons and bring the vibrant world of the story to life in the classroom.

Eric Carle’s Signature Illustrations

Eric Carle’s iconic illustrations in Polar Bear, Polar Bear, What Do You Hear? are a cornerstone of the book’s enduring appeal. His signature collage technique, featuring hand-painted tissue papers, brings the story to life with vibrant, textured visuals. Each animal, from the majestic polar bear to the roaring lion, is depicted with distinct character and detail, captivating young readers. The illustrations not only complement the rhythmic text but also enhance the educational experience by visually introducing children to various zoo animals. In the PDF version of the book, Carle’s artwork remains striking, preserving the original’s charm and color. His unique style has become synonymous with children’s literature, making the book a visual masterpiece that complements its engaging storyline; The illustrations are a key element in making the story memorable and interactive, encouraging children to explore and identify the animals they see and hear.

The Zookeeper’s Role in the Story

The zookeeper plays a pivotal role in Polar Bear, Polar Bear, What Do You Hear?, serving as a bridge between the animals and the children. The zookeeper’s presence adds a sense of authority and structure to the story, while also fostering curiosity and engagement. In the PDF version of the book, the zookeeper’s interactions with the animals are vividly depicted, showcasing their unique sounds and movements. The zookeeper’s dialogue encourages children to participate actively, mimicking the animals and exploring their surroundings. This character also represents a guiding figure, helping young readers learn about the diversity of zoo animals and their distinct characteristics. The zookeeper’s role is both educational and entertaining, making the story a memorable experience for children. By connecting the animals’ sounds to their identities, the zookeeper enhances the learning process, ensuring that the story remains engaging and interactive for young audiences.

Cultural and Educational Impact of the Book

Polar Bear, Polar Bear, What Do You Hear? has left a lasting impact on children’s literature and education. Its rhythmic storytelling and vibrant illustrations have made it a cultural favorite, transcending generations. The book’s focus on animal sounds and interactive learning has revolutionized the way children engage with stories, fostering both creativity and curiosity. Educators praise its ability to teach phonological awareness and language skills through repetition and rhyme. The PDF version has further expanded its reach, making it accessible for digital classrooms and home learning. This accessibility has ensured that the book remains a vital tool for educators worldwide. By blending entertainment with education, it has become a cornerstone of early childhood learning, inspiring a love for reading and exploration. Its influence extends beyond the classroom, shaping how parents and caregivers engage with children through storytelling. The book’s enduring popularity highlights its cultural and educational significance, solidifying its place as a timeless classic in children’s literature.

Polar Bear, Polar Bear, What Do You Hear? remains a beloved and enduring classic in children’s literature. Its engaging rhythm, vibrant illustrations, and interactive elements have captivated young readers for decades. The book’s ability to combine education with entertainment has made it a staple in both homes and classrooms. The availability of the PDF version ensures that its reach extends to digital platforms, making it accessible to a new generation of learners. As part of the iconic series that includes Brown Bear, Brown Bear, What Do You See? and Panda Bear, Panda Bear, What Do You See?, this story continues to inspire a love for reading and learning. Bill Martin Jr.’s rhythmic text and Eric Carle’s signature artwork create a magical experience that resonates with children and adults alike. The book’s timeless appeal lies in its simplicity, interactivity, and universal themes, making it a must-have for every young reader’s library.

rent a manual sod cutter

Renting a manual sod cutter is a cost-effective, eco-friendly solution for small to mid-sized sod removal projects. Lightweight and easy to use, it requires minimal effort and no fuel, making it ideal for precise ground preparation and landscaping tasks. The tool operates via a simple kicking motion, ensuring efficient sod stripping with minimal environmental impact. Perfect for DIY enthusiasts and professionals alike, manual sod cutters offer a practical alternative to gas-powered options, reducing noise and operational costs.

What is a Manual Sod Cutter?

A manual sod cutter is a lightweight, eco-friendly tool designed for efficient sod removal. It features a flat blade, typically 12 inches wide, and operates via a simple kicking motion on a crossbar. The tool is ideal for small to mid-sized landscaping projects, such as preparing garden beds or laying new sod. Its ergonomic handles and kick plate reduce user fatigue, while the adjustable blade ensures precise cutting at desired depths. Unlike gas-powered models, manual sod cutters are quiet, emit no fumes, and require minimal maintenance. They are perfect for residential use, offering a cost-effective and environmentally friendly alternative for precise sod stripping. The compact design and ease of use make it accessible to both professionals and DIY enthusiasts, ensuring efficient results with minimal effort.

Why Rent a Manual Sod Cutter?

Renting a manual sod cutter is a practical choice for small to mid-sized landscaping projects, offering cost-effectiveness and convenience. It eliminates the need for expensive purchases, making it ideal for short-term use. The tool’s lightweight design and ergonomic features ensure ease of operation, reducing fatigue during sod removal. Its eco-friendly nature, with no emissions or noise, makes it suitable for residential areas. Additionally, manual sod cutters are easy to transport and require minimal storage space. Rental options provide flexibility, allowing you to choose the duration that fits your project timeline. Whether for garden bed preparation, laying new sod, or small-scale turf removal, renting a manual sod cutter delivers efficient results without long-term commitment. It’s a budget-friendly solution for achieving professional-quality sod stripping at a fraction of the cost of purchasing equipment.

Benefits of Using a Manual Sod Cutter

A manual sod cutter offers numerous benefits, making it an excellent choice for landscaping and sod removal projects. Its lightweight design and ergonomic handles reduce operator fatigue, allowing for extended use without strain. The tool’s simplicity ensures minimal maintenance, with no need for fuel or complex mechanical adjustments. It provides precise cutting control, ideal for small to mid-sized projects, and leaves a clean edge for seamless sod replacement. Additionally, the manual sod cutter is eco-friendly, producing no emissions or noise, making it suitable for residential areas. Its compact size allows for easy transportation and storage. Renting one is cost-effective, avoiding the expense of purchasing and storing heavy equipment. Whether for gardening, landscaping, or turf preparation, a manual sod cutter delivers efficient, professional-quality results with minimal effort and environmental impact.

How to Rent a Manual Sod Cutter

To rent a manual sod cutter, contact local equipment rental companies, check availability, and reserve online or in-person. Ensure proper rental duration and understand return policies for a smooth experience.

Where to Find Manual Sod Cutter Rentals

Manual sod cutters are widely available for rent at equipment rental stores, home improvement centers, and landscaping supply companies. Popular options include Home Depot, United Rentals, and Sunbelt Rentals, which offer online reservation systems for convenience. Local hardware stores and independent equipment rental businesses may also carry manual sod cutters. Additionally, online platforms like Equipment Rental Direct or local classifieds can connect you with rental providers. Be sure to call ahead to confirm availability, especially during peak landscaping seasons. Some companies offer delivery or in-store pickup options, making it easier to access the tool for your project. Rental periods can range from daily to weekly rates, depending on your needs. Always compare prices and rental terms to find the best option for your sod removal project.

How to Reserve a Manual Sod Cutter

To reserve a manual sod cutter, visit the rental company’s website or call them directly to check availability. Many providers, like Home Depot or United Rentals, offer online reservation systems where you can select your rental period and pickup location. Some companies require a rental request form to be filled out, and a staff member will contact you to confirm the details. Be prepared to provide your preferred rental dates, pickup time, and any special requests. For weekend rentals, select a start time between Friday afternoon and Monday morning to ensure a seamless experience. Availability can vary, especially during peak landscaping seasons, so reserving in advance is recommended. Once confirmed, review the rental agreement and ensure you understand the terms before finalizing your reservation. This process ensures your manual sod cutter is ready when you need it.

Rental Policies and Procedures

Rental policies for manual sod cutters typically include specific terms and conditions to ensure a smooth transaction. Most rental companies require a valid credit card and identification to secure the reservation. Rental periods can be daily, weekly, or monthly, with rates varying depending on the duration. Weekend rentals often incur a charge of one-and-a-half days, with pickup times scheduled between Friday afternoon and Monday morning. Returns must be made by the agreed-upon time to avoid additional fees. Some companies may require a deposit, which is refunded after the equipment is returned in good condition. It’s essential to review the rental agreement carefully before signing, as policies may vary between providers. Ensuring the sod cutter is returned clean and in working order helps avoid extra charges. Always verify the rental company’s policies to understand your responsibilities during the rental period.

Understanding Rental Costs

Understanding rental costs for a manual sod cutter involves considering several factors. Daily rental rates typically range between $20 to $120, depending on the model and rental location. Weekly rentals often provide better value, costing around $80 to $300, while monthly rentals can range from $240 to $600. Weekend rentals may be charged at a flat rate of one-and-a-half days. Additional fees could include delivery, pickup, or damage waivers. Some companies require a deposit, which is refundable upon return of the equipment in good condition. Costs may also vary based on the cutter’s features, such as blade size or weight. It’s important to inquire about all fees upfront to avoid surprises. Always check with the rental provider for precise pricing and any ongoing promotions that could reduce your expenses.

Choosing the Right Manual Sod Cutter

Selecting the right manual sod cutter depends on your project size and needs. Consider blade width, weight, and ergonomic features for efficiency and ease of use.

Types of Manual Sod Cutters Available for Rent

Manual sod cutters come in various designs to suit different project requirements. The most common type is the kick-type sod cutter, which operates via a simple kicking motion on a crossbar, making it ideal for small to mid-sized projects. These cutters typically feature a 12-inch blade, allowing for efficient sod removal with minimal effort. Another option is the push-type manual sod cutter, which is propelled forward by the user, offering better control for straight cuts; Additionally, some rental companies offer adjustable-depth manual sod cutters, enabling users to customize the cutting depth for precise sod removal. Rental options may also include heavy-duty manual sod cutters designed for larger commercial projects, as well as lightweight models for DIY enthusiasts. Many rental providers offer flexible rental periods, including daily, weekly, or monthly rates, ensuring you can choose the right tool for your needs and budget.

Factors to Consider When Selecting a Manual Sod Cutter

When selecting a manual sod cutter for rent, consider the size and scope of your project. For smaller areas, a lightweight, 12-inch blade model is ideal, while larger projects may require a heavier-duty option. Blade width and cutting path are crucial; a 12-inch blade is standard but ensure it matches your project’s needs. Ergonomics are important, as handles and kick plates should reduce fatigue during use. Adjustability is another key factor, as some models allow depth customization for precise sod removal. Additionally, consider the tool’s weight and portability, especially if transporting it. Rental costs and availability should also be evaluated, as prices vary by location and duration. Finally, check if the cutter is suitable for your terrain type, whether it’s flat ground or uneven soil, to ensure optimal performance.

Blade Size and Cutting Path Options

Manual sod cutters are available with varying blade sizes and cutting path widths to suit different project requirements. The most common blade size is 12 inches, which is ideal for small to mid-sized projects, offering a balance between maneuverability and efficiency. For larger areas, 18-inch blades are recommended, as they cover more ground with each pass. Some models feature adjustable blades, allowing you to customize the cutting depth and width based on the thickness of the sod and your specific needs. A wider cutting path reduces the number of passes required, saving time and effort. Additionally, look for cutters with heavy-duty steel blades for durability and clean cuts. The right blade size ensures precise sod removal and optimal performance for your landscaping or gardening tasks. Consider your project’s scale and terrain to select the most suitable blade size and cutting path option.

Using a Manual Sod Cutter Safely and Effectively

For safe and effective use, wear protective gear, maintain a firm grip on ergonomic handles, and employ a steady kicking motion. Ensure the blade is sharp and properly angled to minimize effort and prevent accidents. Regularly inspect the tool for damage and follow proper maintenance guidelines. This ensures optimal performance and longevity of the sod cutter. Always operate on level ground and keep bystanders away. Proper techniques and adherence to safety guidelines will maximize efficiency and results for your sod removal projects.

Safety Tips for Operating a Manual Sod Cutter

Operating a manual sod cutter requires attention to safety to prevent accidents and ensure efficient use. Always wear protective gear, including gloves, safety glasses, and sturdy footwear, to protect yourself from sharp blades and debris. Ensure the area is clear of obstacles and bystanders, especially children, before starting. Maintain a firm grip on the ergonomic handles to control the cutter’s movement. Avoid wearing loose clothing that could get caught in the blade. Operate the sod cutter on level ground to maintain balance and prevent slipping. Keep the blade sharp and well-maintained to avoid accidental breaks or uneven cuts. Use the correct kicking motion as instructed to avoid strain or loss of control. Regularly inspect the tool for damage and follow the manufacturer’s guidelines for safe operation; Proper safety practices ensure a smooth and injury-free sod removal process.

Best Practices for Sod Removal

For effective sod removal using a manual sod cutter, start by planning your project to ensure efficient use of time and effort. Always maintain the blade’s sharpness to achieve clean cuts and avoid tearing the sod. Work in straight, consistent lines, using the tool’s ergonomic handles to guide the cutter smoothly. Adjust the blade depth based on the thickness of the sod to remove the entire root system. After cutting, carefully pry up the sod strips and roll them for easy removal. Dispose of the sod responsibly, either by composting or repurposing it. Keep the ground moist to make cutting easier and reduce strain on the tool. After completing the job, rake the soil to create a smooth surface for seeding or laying new sod. Regularly clean and maintain the sod cutter to ensure optimal performance during the rental period. Proper hydration and regular breaks are also essential for safety and productivity.

How to Maintain the Sod Cutter During Rental

Proper maintenance of a manual sod cutter during rental is essential to ensure optimal performance and extend its lifespan; After each use, clean the blade thoroughly to remove dirt, grass, and debris, which can rust or dull the edge. Use a wire brush or cloth to wipe down the blade and handles. Regularly inspect the blade for sharpness and have it sharpened if necessary, as a dull blade requires more effort and can damage the tool. Lubricate moving parts, such as hinges or bolts, to prevent rust and ensure smooth operation. Store the sod cutter in a dry, secure location to avoid exposure to harsh weather conditions. Always follow the manufacturer’s guidelines for maintenance and handle the tool with care to avoid accidental damage during transport or storage. Proper care ensures the sod cutter remains efficient and reliable throughout your rental period.

Comparing Manual and Gas-Powered Sod Cutters

Manual sod cutters are eco-friendly, cost-effective, and ideal for small projects, while gas-powered models offer more power for larger tasks but come with higher costs and environmental impact.

Advantages and Disadvantages of Manual Sod Cutters

Manual sod cutters offer several advantages, including being lightweight, eco-friendly, and cost-effective. They are ideal for small to medium-sized projects, requiring no fuel and producing minimal noise. The tool’s simplicity ensures low maintenance and easy storage. Additionally, manual sod cutters provide precise control, making them perfect for intricate landscaping tasks. They are also budget-friendly, with lower rental costs compared to gas-powered models.

However, manual sod cutters have limitations. They require physical effort, as operation depends on a kicking motion, which can be tiring for large areas. They are less efficient for heavy-duty tasks and may struggle with dense or uneven terrain. Additionally, they are not suitable for commercial-scale projects due to their smaller cutting capacity. Despite these drawbacks, manual sod cutters remain a practical choice for DIY enthusiasts and small landscaping jobs.

When to Choose a Gas-Powered Sod Cutter

Gas-powered sod cutters are ideal for large-scale projects requiring high efficiency and speed. They are best suited for commercial landscaping tasks or extensive turf replacement, where manual cutters would be too time-consuming. These machines are heavier and more robust, capable of cutting through dense sod and handling uneven terrain with ease. For professionals needing to cover vast areas quickly, gas-powered sod cutters are the better choice due to their superior cutting capacity and faster operation.

Additionally, gas-powered models are preferable when physical labor is a concern. They eliminate the need for manual kicking or pushing, reducing operator fatigue. However, they produce emissions and are noisier, making them less suitable for residential or small-scale projects. For large jobs where time and efficiency are critical, gas-powered sod cutters offer unmatched performance and productivity.

Tips for Renting a Manual Sod Cutter

Always inspect the sod cutter before rental to ensure proper condition. Check availability and pricing in advance, and understand rental durations to avoid extra charges. Ensure safe transportation and follow all usage guidelines for optimal performance.

Checking the Condition of the Sod Cutter Before Rental

Checking the Condition of the Sod Cutter Before Rental

Before renting a manual sod cutter, inspect its condition thoroughly. Ensure the blade is sharp and free from damage, as a dull or damaged blade will reduce efficiency. Check the handles and kick mechanism for any wear or damage, as these are critical for operation. Verify that all bolts and screws are tightened securely to maintain stability. Look for signs of rust or corrosion, which could weaken the tool. Test the depth adjustment to ensure it functions properly, allowing precise sod removal. Inspect the wheels or glides for smooth movement and no obstructions. Finally, confirm that all parts are included and undamaged. Testing the cutter on a small area before full use can help identify any issues. A well-maintained sod cutter ensures safety, efficiency, and successful project completion.

How to Transport the Sod Cutter Safely

Transporting a manual sod cutter safely requires careful planning to prevent damage and ensure secure handling. Begin by ensuring the cutter is clean and dry to avoid dirt or moisture causing issues during transit. For lighter models (around 26 lbs), carrying by hand or using a hand truck is efficient. Heavier models (up to 140 lbs) may require a dolly or cart with sturdy straps to secure the unit. If using a vehicle, place the sod cutter in an SUV or pickup truck, tying it down with ropes or straps to prevent movement. Protect the blade with a cover or padding to avoid scratches or injuries. Store it upright or flat, ensuring stability. Always lift with care, bending at the knees to avoid strain. For long-distance transport, consider disassembling parts if possible. Ensure the transportation area is clear of obstacles to maintain safety and control during movement;

Troubleshooting Common Issues

When renting a manual sod cutter, common issues may arise during operation. One frequent problem is difficulty cutting through hard or dry sod, which can be resolved by watering the area beforehand to soften the soil. Blade dullness may also occur, reducing efficiency; regular sharpening or replacing the blade can address this. If the sod cutter feels heavy or hard to push, check for proper blade depth adjustment, as setting it too deep can increase resistance. Additionally, ensure the tool is clean and free of debris, as clogged blades can hinder performance. For models with a kick mechanism, improper foot placement may cause inefficiency; practice the correct kicking technique to maintain consistent cuts. Lastly, always inspect the sod cutter for damage before use and report any issues to the rental provider to avoid further complications during your project.

Environmental and Cost Benefits

Renting a manual sod cutter offers eco-friendly, cost-effective sod removal with no fuel emissions, minimal noise, and lower rental fees, ideal for small projects and budget-conscious users.

Eco-Friendly Aspects of Manual Sod Cutters

Manual sod cutters are an environmentally friendly choice for sod removal, producing no emissions or noise pollution. Unlike gas-powered alternatives, they rely solely on manual effort, eliminating fuel consumption and reducing carbon footprints. This makes them ideal for eco-conscious projects. Lightweight and requiring minimal storage space, they also reduce transportation-related emissions. Additionally, manual sod cutters promote sustainable landscaping by allowing precise sod removal, minimizing waste, and preserving soil health. Their quiet operation is also less disruptive to wildlife and neighborhoods. For small to mid-sized projects, manual sod cutters offer a greener, cost-effective solution that aligns with environmental goals while maintaining efficiency.

Cost-Effective Solutions for Sod Removal

Renting a manual sod cutter offers a budget-friendly solution for sod removal projects. With rental options starting as low as $20 for a 4-hour period and $80 for a weekly rental, it provides significant savings compared to purchasing or hiring professional services. Manual sod cutters are particularly cost-effective for small to mid-sized projects, eliminating the need for expensive gas-powered equipment. Their lightweight design and ease of use reduce labor costs, as they can be operated by a single person. Additionally, renting allows you to pay only for the time you need the tool, avoiding long-term ownership expenses. This makes manual sod cutters an ideal choice for homeowners, landscapers, and contractors seeking affordable yet efficient sod removal solutions without compromising on quality or performance.

Renting a manual sod cutter offers a cost-effective, eco-friendly solution for efficient sod removal, perfect for small to mid-sized projects and ideal for DIYers and professionals.

Final Thoughts on Renting a Manual Sod Cutter

Renting a manual sod cutter is a practical and efficient solution for small to mid-sized sod removal projects. Its lightweight design, ergonomic handles, and simple kicking mechanism make it easy to use while minimizing physical strain. The tool’s eco-friendly nature, with no fuel required, aligns with environmentally conscious landscaping practices. It’s ideal for DIY enthusiasts and professionals alike, offering precision and cost-effectiveness for ground preparation and turf removal. With minimal maintenance and no emissions, a manual sod cutter is a smart choice for those seeking a reliable, budget-friendly option. Whether for gardening, landscaping, or small-scale projects, renting this tool ensures you can achieve professional results without the need for heavy machinery.

raspberry pi zero w aprs sdr manual

The Raspberry Pi Zero W APRS SDR combines compact computing, wireless connectivity, and radio capabilities for amateur radio enthusiasts. It enables real-time tracking, communication, and signal analysis, offering a versatile platform for experimentation and learning in radio communication.

1.1 Overview of the Raspberry Pi Zero W

The Raspberry Pi Zero W is a compact, low-power, and cost-effective single-board computer designed for embedded systems and DIY projects. It features a Broadcom BCM2835 processor, 512MB RAM, and built-in Wi-Fi and Bluetooth connectivity. Weighing just 9 grams, it is highly portable and ideal for space-constrained applications. The board includes GPIO pins for hardware interfacing, enabling integration with sensors, radios, and other peripherals. Its small form factor and wireless capabilities make it a popular choice for IoT, robotics, and amateur radio projects. Despite its size, the Pi Zero W delivers sufficient processing power for lightweight applications, making it a versatile tool for both beginners and experienced makers.

1.2 What is APRS (Automatic Packet Reporting System)?

APRS (Automatic Packet Reporting System) is a real-time digital communication system used by amateur radio operators to transmit data such as GPS coordinates, weather information, and messages. It operates on radio frequencies, allowing users to share data dynamically. APRS integrates GPS data, enabling the tracking of moving objects like vehicles or weather balloons. The system is widely used for emergency communications, event coordination, and personal tracking. It supports various data types, including position reports, weather data, and short messages. APRS data can be visualized on maps, providing a graphical representation of activities. This makes it invaluable for both hobbyists and professionals in amateur radio and beyond.

1.3 Understanding SDR (Software-Defined Radio)

SDR (Software-Defined Radio) is a radio communication system where hardware components are replaced with software. This allows for flexible tuning of frequencies, modulation types, and signal processing. SDR enables users to decode and analyze various radio signals, making it ideal for experimentation and real-time monitoring. Tools like GQRX and CubicSDR provide visual representations of signals, enhancing the ability to explore different frequencies and modes. SDR’s versatility and cost-effectiveness make it a popular choice for amateur radio enthusiasts. By integrating SDR with the Raspberry Pi Zero W, users can create a powerful, compact system for radio exploration and communication, perfect for projects like APRS and beyond.

1.4 Benefits of Combining Raspberry Pi Zero W with APRS and SDR

Combining the Raspberry Pi Zero W with APRS and SDR offers a powerful, compact, and cost-effective solution for amateur radio enthusiasts. The Raspberry Pi Zero W’s small size and low power consumption make it ideal for portable setups, while APRS enables real-time communication and data sharing. SDR adds flexibility for tuning and analyzing radio signals. Together, these technologies provide a versatile platform for tracking, messaging, and experimentation. This integration allows users to engage in diverse activities like weather monitoring, object tracking, and signal exploration. The system’s scalability and software flexibility also make it suitable for both beginners and advanced users, fostering innovation and learning in the field of radio communication.

Hardware Requirements for the Project

The Raspberry Pi Zero W, RTL-SDR dongle, antenna, and power supply are essential. Additional hardware like cases or coolers can be included as needed.

2.1 Raspberry Pi Zero W

The Raspberry Pi Zero W is a compact, low-power, and cost-effective single-board computer. It features a Broadcom BCM2835 processor, 512MB RAM, and built-in Wi-Fi and Bluetooth connectivity. Its small form factor and GPIO pins make it ideal for hardware projects; The Raspberry Pi Zero W runs on Raspberry Pi OS, a lightweight Linux-based operating system. Its low power consumption and wireless capabilities make it perfect for portable APRS and SDR applications. With its affordable price and versatility, the Raspberry Pi Zero W is the core component of this project, enabling efficient processing and connectivity for both APRS and SDR functionalities.

2.2 RTL-SDR Dongle

The RTL-SDR (Software-Defined Radio) dongle is a low-cost, versatile USB device based on the RTL2832U chipset. It enables the Raspberry Pi Zero W to receive a wide range of radio frequencies, making it ideal for SDR applications. The dongle supports frequencies between 24 MHz and 1.7 GHz, allowing users to tune into various signals, from amateur radio bands to weather satellites. Its compact size and plug-and-play compatibility with the Raspberry Pi Zero W simplify setup. The RTL-SDR dongle is essential for decoding and visualizing radio signals, complementing the APRS capabilities of the system. It provides a cost-effective solution for exploring the world of software-defined radio.

2.3 Antenna Selection

Proper antenna selection is crucial for optimal performance in your Raspberry Pi Zero W APRS SDR setup. The antenna plays a key role in receiving and transmitting signals, directly impacting the quality and range of communication. For APRS and SDR applications, a VHF/UHF antenna is typically recommended, as it operates within the frequency bands commonly used for amateur radio. Consider using a quarter-wave ground plane or a collinear antenna for improved signal reception. Ensure the antenna is properly matched to the RTL-SDR dongle’s impedance to minimize signal loss. Additionally, position the antenna in an elevated, unobstructed location to maximize coverage and reduce interference. Experimenting with different antenna configurations can significantly enhance your system’s performance.

2.4 Power Supply for Raspberry Pi Zero W

A reliable power supply is essential for the stable operation of the Raspberry Pi Zero W. The device requires a 5V DC power source with a minimum current rating of 1.2A to ensure optimal performance. Using an official Raspberry Pi power adapter is recommended to avoid voltage fluctuations and overheating. For portable setups, a high-capacity battery with proper voltage regulation can be used. Ensure the power supply is clean and stable, as fluctuations can cause system instability or data loss. Additionally, consider using a USB cable with built-in noise filtering to minimize interference. Proper power management is critical for maintaining the integrity of APRS and SDR operations, especially during continuous use.

2.5 Additional Hardware (Optional)

Optional hardware can enhance functionality and usability. An external case or enclosure protects the Raspberry Pi Zero W and improves heat dissipation; Cooling solutions like small heatsinks or fans can prevent overheating during prolonged use. For audio monitoring, a USB speaker or headphone jack can be added to listen to decoded signals. A GPIO breakout board simplifies connections for additional peripherals. USB extension cables can help position the RTL-SDR dongle away from the Pi, reducing interference. These additions are not essential but can improve performance, convenience, and expand the project’s capabilities for advanced users.

Software Setup and Installation

Install Raspberry Pi OS, APRS software (Dire Wolf, XASTIR), and SDR tools (GQRX, CubicSDR). Configure GPIO settings for optimal performance and ensure all dependencies are properly installed.

3.1 Installing the Operating System (Raspberry Pi OS)

Begin by downloading the latest version of Raspberry Pi OS from the official Raspberry Pi website; Use the Raspberry Pi Imager tool to write the OS image to your microSD card. Ensure your computer has a card reader to insert the microSD card. Open the Imager, select “Raspberry Pi OS (Other)” and choose the desired version. Select the microSD card as the target and proceed with the installation. Once complete, insert the microSD card into your Pi Zero W. Connect to a monitor and keyboard for setup or enable SSH for headless access by placing an empty ‘ssh’ file on the boot partition. After booting, configure Wi-Fi using the Raspberry Pi Configuration tool and update the system with sudo apt-get update and sudo apt-get upgrade. Consider changing the default username and password for security before proceeding with APRS and SDR software installations.

3.2 Installing APRS Software (Dire Wolf, XASTIR)

Install Dire Wolf and XASTIR to enable APRS functionality on your Pi Zero W. Use the terminal to run sudo apt-get install direwolf and sudo apt-get install xastir. Configure Dire Wolf by editing the configuration file using sudo nano /etc/direwolf.conf, setting your callsign, location, and APRS parameters. For XASTIR, run sudo xastir to launch the interface. Set up the APRS server connection in the XASTIR preferences, enabling real-time packet transmission and reception. Ensure both programs are configured to work with your RTL-SDR dongle for seamless APRS operation. These tools allow you to send and receive APRS packets, facilitating communication and data sharing over amateur radio networks.

3.3 Installing SDR Software (GQRX, CubicSDR)

Install GQRX and CubicSDR to leverage SDR capabilities on your Raspberry Pi Zero W. Use the terminal to run sudo apt-get install gqrx and sudo apt-get install cubicsdr. GQRX is a user-friendly SDR application ideal for tuning radio frequencies and visualizing signals. Launch it with gqrx and configure the RTL-SDR dongle as the device. CubicSDR offers advanced features for signal processing and decoding. Start it with cubicsdr and select the RTL-SDR device. Both tools allow you to calibrate the SDR, set frequencies, and decode digital modes. Ensure proper configuration of the RTL-SDR in the software settings for optimal performance. These applications provide real-time signal visualization and decoding, enhancing your SDR experience on the Pi Zero W.

3.4 Configuring GPIO for SDR and APRS

Configure the GPIO pins on your Raspberry Pi Zero W to enable communication between the SDR and APRS systems. GPIO pins 23 and 24 are typically used for this purpose. Edit the configuration file rtlfm_sdr.conf to specify these pins. Install and configure rtl_fm to interface with the RTL-SDR dongle, ensuring proper frequency tuning. Use direwolf to decode and encode APRS messages, configuring it to work with the GPIO pins. Ensure all software is properly synced with the hardware. Test the setup using tools like gpiotool to verify GPIO functionality. This configuration enables seamless integration of SDR and APRS, allowing real-time signal processing and communication.

Configuring the Raspberry Pi Zero W for APRS

Configure the Raspberry Pi Zero W for APRS by setting up parameters, enabling real-time communication, and ensuring proper hardware integration. This process involves configuring the RTL-SDR, setting up the iGate, and testing connectivity for reliable data transmission and tracking.

4.1 Setting Up APRS Parameters

Configuring APRS parameters is essential for proper functionality. This includes setting your callsign, location data, and beacon intervals. Use software like Dire Wolf to define these settings, ensuring accurate position reporting and messaging. Specify the frequency and modulation for transmission, and enable digipeating if required. These parameters ensure your Raspberry Pi Zero W communicates effectively within the APRS network, bridging on-air signals with the internet. Proper configuration guarantees reliable data transmission, enabling real-time tracking and communication. Always test your setup to confirm parameters are correctly applied and functioning as intended.

4.2 Configuring the RTL-SDR Dongle

Configuring the RTL-SDR dongle is crucial for receiving and decoding APRS signals. Begin by installing the necessary drivers and software, such as rtl_fm, to enable the dongle’s functionality. Use commands like rtl_fm -f 144800000 -s 22050 -g 50 to tune into the APRS frequency (144.800 MHz). Adjust the gain and sample rate for optimal signal reception. Ensure the dongle is properly connected to the Raspberry Pi Zero W and recognized by the system. Proper configuration ensures reliable signal capture and decoding, enabling seamless integration with APRS software for real-time data processing and transmission.

4.3 Setting Up the APRS iGate

Setting up the APRS iGate involves configuring the system to bridge on-air APRS signals with the internet-based APRS network. Install and configure software like Dire Wolf to decode APRS packets from the RTL-SDR dongle. Define your callsign, password, and APRS-IS server details in the configuration file. Ensure the iGate is set to forward packets between the radio and the internet. Test the setup by transmitting a test packet and verifying its appearance on APRS mapping sites. Properly configured, the iGate enhances APRS coverage and enables real-time data sharing across the network.

4.4 Testing APRS Connectivity

Testing APRS connectivity ensures your system is functioning correctly. Transmit a test packet using your APRS software to verify it appears on APRS mapping sites. Check if your callsign, position, and message are accurately displayed. Monitor the system’s performance using tools like Dire Wolf or XASTIR to ensure smooth data transmission and reception. Verify that the RTL-SDR dongle is correctly decoding signals and forwarding them to the APRS network. Address any connectivity issues by reviewing network settings and ensuring proper configuration. Successful testing confirms your Raspberry Pi Zero W is effectively bridging on-air and internet-based APRS communication.

Configuring the SDR Functionality

Configure the SDR by setting up the RTL-SDR dongle, tuning frequencies, and optimizing signal reception. Use software like GQRX or CubicSDR for visualization and advanced processing.

5.1 Tuning and Calibration of the SDR

Tuning and calibrating the SDR ensures optimal performance. Start by setting the correct frequency using GQRX or CubicSDR. Adjust the gain and bandwidth to minimize noise. Calibrate the RTL-SDR by checking oscillator offset, ensuring accurate tuning. Use calibration tools to fine-tune frequency accuracy. Proper configuration enables clear signal reception and decoding, essential for APRS and SDR applications. Regular recalibration may be needed for stability, especially in varying environmental conditions, ensuring reliable operation of the Raspberry Pi Zero W APRS SDR setup.

5.2 Setting Up Frequency and Modulation

Setting the correct frequency and modulation is crucial for receiving and decoding signals. Use GQRX or CubicSDR to select the desired frequency, typically within the amateur radio bands (e.g., 144 MHz for APRS). Adjust the modulation type, such as narrowband FM (NFM), to match the transmission standard. Ensure the sample rate and gain are optimized for signal clarity. Fine-tune the squelch level to filter out weak or unwanted signals. Properly configured frequency and modulation settings ensure accurate signal reception and decoding, enabling reliable APRS and SDR functionality on the Raspberry Pi Zero W. Regularly verify settings to maintain optimal performance across different radio frequencies.

5.3 Using GQRX for Signal Visualization

GQRX is a powerful SDR tool that provides a graphical interface for visualizing radio signals. It displays signals as a waterfall diagram and spectrum, allowing users to monitor frequency activity in real time. To use GQRX, configure the RTL-SDR dongle by selecting the correct device and setting the frequency, sample rate, and gain. Adjust the modulation type (e.g., FM) and squelch level to optimize signal reception. The waterfall display helps identify active frequencies, while the spectrum view shows signal strength. GQRX enables users to fine-tune their setup, ensuring accurate signal decoding and visualization. This tool is essential for troubleshooting and refining the Raspberry Pi Zero W APRS SDR system for optimal performance.

5.4 Using CubicSDR for Advanced Signal Processing

CubicSDR is a sophisticated SDR application offering advanced signal processing capabilities. It provides a user-friendly interface for analyzing and decoding radio signals, with features like multi-tabbed views, customizable filters, and real-time signal adjustments. Users can explore various modulation types, adjust Equalizer settings, and enable noise reduction for clearer reception. CubicSDR supports multiple SDR devices, including the RTL-SDR dongle, making it a versatile tool for the Raspberry Pi Zero W setup. Its ability to handle complex signal analysis and decoding makes it ideal for experimenting with digital modes and advanced radio protocols. CubicSDR complements the APRS and SDR functionalities, offering a robust platform for enthusiasts to explore and refine their radio communication skills.

Applications of the Raspberry Pi Zero W APRS SDR

The Raspberry Pi Zero W APRS SDR offers versatile applications, including real-time communication, weather monitoring, and experimental radio projects, making it a powerful tool for amateur radio enthusiasts.

6.1 Tracking and Monitoring APRS Data

The Raspberry Pi Zero W APRS SDR setup enables efficient tracking and monitoring of APRS data, allowing users to receive and decode location reports, weather information, and messages. By integrating the RTL-SDR dongle, the system captures APRS packets transmitted over radio frequencies. The decoded data is processed and forwarded to the APRS network, where it can be visualized on maps. This capability is particularly useful for tracking moving objects, such as vehicles or weather balloons, in real time. The compact size and low power consumption of the Raspberry Pi Zero W make it ideal for both fixed and mobile APRS tracking applications, providing a reliable and portable solution for amateur radio enthusiasts.

6.2 Real-Time Communication and Messaging

The Raspberry Pi Zero W APRS SDR setup facilitates real-time communication and messaging, enabling users to transmit and receive APRS packets efficiently. By leveraging the APRS network, enthusiasts can share location data, weather reports, and text messages seamlessly. The system acts as a bridge between local radio transmissions and the global APRS Internet System (APRS-IS), ensuring widespread accessibility. This capability is particularly valuable for amateur radio operators, allowing them to stay connected and share critical information during events or in remote areas. The compact and portable nature of the Raspberry Pi Zero W makes it an ideal solution for on-the-go communication, enhancing reliability and accessibility in amateur radio activities.

6.3 Weather Monitoring and Reporting

The Raspberry Pi Zero W APRS SDR setup is an excellent tool for weather monitoring and reporting. By integrating sensors for temperature, humidity, wind speed, and other environmental factors, users can transmit real-time weather data via APRS. This data can be shared locally or uploaded to global APRS networks, providing valuable insights for weather enthusiasts and emergency responders. The system’s portability and low power consumption make it ideal for deploying in remote locations or during field operations. Weather stations connected to the Raspberry Pi Zero W can automatically generate APRS weather reports, enabling accurate and timely forecasting. This capability enhances community preparedness and supports amateur radio contributions to public safety efforts.

6.4 Experimental Radio Projects

The Raspberry Pi Zero W APRS SDR setup offers a versatile platform for experimenting with radio signals and protocols. Users can explore decoding digital modes, testing new modulation techniques, and analyzing signal propagation. The system’s flexibility allows enthusiasts to prototype custom radio applications, such as satellite communication receivers or experimental packet networks. By leveraging the SDR capabilities, hobbyists can decode and visualize various radio signals, from amateur satellites to weather balloons. This setup encourages innovation and learning, providing a hands-on approach to understanding radio communication. Whether it’s testing new antennas or developing custom software, the Raspberry Pi Zero W APRS SDR fosters creativity and experimentation in the realm of amateur radio.

Troubleshooting Common Issues

Common issues with Raspberry Pi Zero W APRS SDR include hardware incompatibility and software glitches. Check configurations, use diagnostic tools, and ensure proper antenna connections for optimal performance.

7.1 Solving Hardware Compatibility Problems

Hardware compatibility issues with the Raspberry Pi Zero W APRS SDR setup often arise from improper USB dongle connections or antenna mismatches. Ensure the RTL-SDR dongle is recognized by the system and configured correctly. If the dongle isn’t detected, try reinstalling the drivers or using a different USB port. Antenna selection is critical; a poorly matched antenna can lead to weak signals or no reception. Verify that the antenna is suitable for the frequency range you’re using. Additionally, check the power supply to ensure it meets the Raspberry Pi Zero W’s requirements. Inconsistent power can cause system instability. Consult online forums or hardware manuals for troubleshooting specific components;

7.2 Resolving Software Configuration Errors

Software configuration errors in the Raspberry Pi Zero W APRS SDR setup often stem from incorrect installation or misconfiguration of APRS and SDR tools. Begin by verifying that all software packages, such as Dire Wolf or GQRX, are installed correctly and up-to-date. Check system logs using `journalctl` to identify error messages. Reinstalling software or running updates may resolve corrupted files or dependencies. Ensure configuration files for APRS and SDR are properly formatted and aligned with hardware settings. If issues persist, restore default configurations or consult community forums for troubleshooting guides specific to your software stack. Attention to detail in configuration steps can prevent recurring errors.

7.3 Fixing Network and Connectivity Issues

Network and connectivity issues with the Raspberry Pi Zero W APRS SDR setup can disrupt data transmission and reception. Ensure WiFi is enabled and properly configured using `raspi-config`. Verify the SSID and password are correct. If using a static IP, check the `dhcpcd` configuration; Test connectivity by pinging the router or an external server. Firewall settings may block required ports, so review and adjust rules as needed. Restart the networking service or reboot the system if issues persist. For SSH access problems, confirm the hostname or IP address and ensure SSH is enabled. If problems remain, reinstall the OS or restore network settings to default. Always test connectivity before proceeding with APRS or SDR operations.

7.4 Optimizing Performance for Low-Power Devices

Optimizing performance for the Raspberry Pi Zero W APRS SDR setup is crucial for smooth operation on a low-power device. Disable unnecessary services using `raspi-config` to reduce CPU load. Use lightweight software alternatives to minimize memory usage. Adjust the `config.txt` file to overclock the CPU if needed, but ensure proper cooling to prevent overheating. Limit background processes and close unused applications to conserve resources. For SDR operations, reduce sample rates and buffer sizes in software like GQRX or CubicSDR to avoid lag. Regularly update and optimize code for APRS and SDR applications to improve efficiency. Monitor system performance using tools like `htop` to identify bottlenecks and allocate resources effectively.

The Raspberry Pi Zero W APRS SDR project offers a powerful, compact solution for amateur radio enthusiasts, enabling real-time communication and experimentation with future enhancements and fostering innovation in wireless communication.

8.1 Summary of the Project

The Raspberry Pi Zero W APRS SDR project integrates a compact single-board computer with APRS and SDR technologies, enabling amateur radio enthusiasts to track, communicate, and analyze radio signals. By combining the Raspberry Pi Zero W’s processing power with an RTL-SDR dongle and appropriate software, users can create a versatile system for real-time data transmission and signal decoding. This setup supports APRS tracking, weather monitoring, and experimental radio projects, making it a cost-effective and flexible solution for hobbyists and educators. The project highlights the potential of low-power devices in modern radio communication, offering a platform for continuous learning and innovation in wireless technologies.

8.2 Potential Upgrades and Enhancements

The Raspberry Pi Zero W APRS SDR setup can be enhanced with upgrades such as a high-gain antenna for improved signal reception, an external case for better thermal management, or a more advanced SDR dongle for increased sensitivity. Software enhancements include customizing APRS and SDR applications or integrating AI for predictive analytics. Adding a GPS module could enable precise location tracking, while a solar-powered battery system would improve portability. Upgrading to a more advanced radio interface or integrating with other IoT devices could further expand functionality. These upgrades allow users to tailor the system to specific needs, enhancing performance and versatility for amateur radio and experimental projects.

8.3 Encouragement to Explore Further

Exploring the Raspberry Pi Zero W APRS SDR opens a world of possibilities for amateur radio enthusiasts and tech hobbyists. Dive into the project, experiment with custom configurations, and unlock new ways to engage with radio communication. Start by building your APRS tracker or experimenting with digital modes. Connect with online communities to share ideas and learn from others. Discover the thrill of real-time data tracking, weather monitoring, and signal analysis. This project is a gateway to innovation and creativity, offering endless opportunities for growth and experimentation. Embrace the journey, and let your curiosity guide you to new heights in amateur radio and beyond!

sylvania lamp cross reference guide

The Sylvania Lamp Cross Reference Guide is a comprehensive tool for finding compatible lamp replacements, ensuring optimal performance and energy efficiency across various applications.

1.1 Understanding the Importance of Cross Referencing

Cross referencing is essential for ensuring compatibility and optimal performance when selecting replacement lamps. It helps consumers avoid mismatches, ensuring safety and efficiency. By referencing Sylvania’s guide, users can identify the correct lamp type for their specific needs, whether for automotive or household use. This process prevents installation issues and enhances lighting performance, making it a crucial step in maintaining safety and energy efficiency. Accurate cross referencing also supports eco-friendly choices and cost savings.

1.2 Overview of Sylvania Lamps and Their Applications

Sylvania offers a wide range of lamps for various applications, including automotive, household, and specialty lighting. Their product line includes halogen, LED, and smart lighting solutions. Automotive lamps like H1 and 9003 are designed for vehicle headlights, while household options such as A19 and BR30 cater to residential needs. Specialty lamps, including smart bulbs, provide advanced features like color-changing and energy efficiency. These lamps are used in diverse settings, ensuring reliable illumination and meeting specific performance requirements for both functionality and aesthetics.

Understanding Sylvania Lamp Cross Referencing

Understanding Sylvania lamp cross-referencing involves matching lamp types by base, wattage, and ANSI codes, ensuring compatibility and optimal performance for various lighting needs and applications.

2.1 What is a Cross Reference Guide?

A cross reference guide is a detailed resource that helps users identify compatible lamp replacements by comparing specifications such as base type, wattage, and ANSI codes. It simplifies the process of finding equivalent lamps from different manufacturers, ensuring that the selected bulb meets the required performance standards for specific applications; This guide is particularly useful for consumers and professionals seeking to replace lamps efficiently without compromising on quality or functionality.

2.2 Key Factors in Cross Referencing Lamps

When cross referencing lamps, key factors include base type, wattage, voltage, and ANSI codes to ensure compatibility. Lamp application, such as automotive or household use, is crucial. Performance metrics like brightness and color temperature must align with user needs. Additionally, compatibility with fixtures and dimmers should be verified. Energy efficiency and lifespan are also important considerations, along with technological type, such as LED or halogen. These factors ensure the selected lamp meets both functional and performance requirements effectively.

How to Use the Sylvania Lamp Cross Reference Guide

The Sylvania Lamp Cross Reference Guide simplifies finding the right bulb by allowing users to input vehicle or fixture details, instantly matching them with compatible lamps easily.

3.1 Identifying Your Lamp Type

Identifying your lamp type is the first step in using the Sylvania Cross Reference Guide. Start by checking the owner’s manual or the bulb itself for part numbers like H1, 9003, or A19. Note the base type, such as E12 or GX24q, and wattage. For automotive lamps, refer to the vehicle’s specifications. This information ensures accurate cross-referencing, helping you find the correct replacement efficiently. Proper identification guarantees compatibility and optimal performance for your lighting needs.

3.2 Inputting Vehicle or Fixture Details

Once your lamp type is identified, input the vehicle’s make, model, and year or fixture details into Sylvania’s online cross-reference tool. This step ensures compatibility by matching your specific needs with the correct bulb. For vehicles, enter the year, make, and model to filter results. For fixtures, provide details like lamp type, base, and wattage. This precise input guarantees accurate recommendations, saving time and ensuring the right fit for your lighting requirements. Accurate details enhance the reliability of the cross-reference results.

3.3 Interpreting the Cross Reference Results

After generating results, review the recommended lamps, focusing on key factors like brightness, color temperature, and lifespan. Ensure compatibility with your vehicle or fixture by comparing the suggested bulbs to your original specifications. Pay attention to product lines such as SilverStar Ultra or XtraVision, which offer enhanced performance. Verify wattage, base type, and ANSI codes to confirm suitability. Use the results to identify the best fit for your needs, whether prioritizing brightness, energy efficiency, or cost-effectiveness. Always cross-check with your owner’s manual for precise part numbers.

Sylvania Lamp Types and Their Uses

Sylvania offers various lamp types, including automotive (e.g., H1, H3, 9003), household (e.g., A19, BR30), and specialty lamps (e.g., smart bulbs, LED), each designed for specific applications.

4.1 Automotive Lamps (e.g., H1, H3, 9003)

Sylvania’s automotive lamps, such as H1, H3, and 9003, are designed for vehicle lighting systems. These bulbs are engineered to provide bright, reliable light for safe driving. H1 and H3 are popular for headlights, while 9003 bulbs are commonly used in fog lights. They offer enhanced visibility and durability, making them ideal replacements for various automotive applications. Sylvania’s automotive range includes options like SilverStar Ultra and XtraVision, catering to different driving needs and preferences.

4.2 Household and Commercial Lamps (e.g., A19, BR30)

Sylvania’s household and commercial lamps, such as A19 and BR30, are designed for general lighting needs. A19 bulbs are standard for residential use, while BR30 lamps are ideal for recessed lighting. These energy-efficient options offer long lifespans and consistent performance. Sylvania’s SmartPlus LED bulbs are popular for their dimmability and eco-friendly design, making them suitable for both home and commercial settings. They provide reliable illumination while reducing energy consumption.

4.3 Specialty Lamps (e.g., Smart Bulbs, LED)

Sylvania’s specialty lamps include smart bulbs and LED options, offering advanced features like color-changing and voice control. Their SmartPlus LED bulbs are energy-efficient and last longer than traditional bulbs. These lamps are perfect for modern homes, providing vibrant colors and adjustable whites. With compatibility with smart home systems, they enhance convenience and customization. Sylvania’s specialty lamps are ideal for those seeking innovative lighting solutions that combine functionality with sleek design.

Sylvania Cross Reference Guide by Lamp Category

Sylvania’s cross reference guide organizes lamps by base type, wattage, voltage, and ANSI codes, simplifying the search for compatible replacements across various lighting needs and applications.

5.1 By Base Type (e.g., E12, GX24q)

Sylvania’s cross reference guide categorizes lamps by base type, such as E12 and GX24q, ensuring compatibility and simplifying replacement. This system helps users identify the correct base for their fixtures, whether for automotive, household, or specialty applications. By sorting lamps by base type, the guide streamlines the search process, reducing confusion and ensuring the right fit. Users can easily navigate through options like E12 (candelabra) or GX24q (4-pin) bases, making replacement straightforward and efficient. This method also covers various wattage and voltage requirements, ensuring optimal performance. For more detailed information, visit Sylvania’s official catalog.

5.2 By Wattage and Voltage

Sylvania’s cross reference guide organizes lamps by wattage and voltage, ensuring users find the perfect match for their fixtures. This method helps identify lamps with specific energy requirements, such as 42-watt CFLs or LED equivalents. By categorizing lamps by wattage and voltage, the guide simplifies the selection process, ensuring compatibility and safety. Users can easily find replacements that meet their energy needs without compromising performance. This approach also highlights energy-efficient options, aiding in cost-effective decisions. For detailed specs, visit Sylvania’s catalog.

5.3 By ANSI Code

The ANSI (American National Standards Institute) code system categorizes lamps based on standardized specifications. Sylvania’s cross reference guide uses ANSI codes to ensure precise matching of lamp types and applications. For example, codes like M47 for metal halide lamps or M110 for specific Wattage/Voltage combinations help users pinpoint exact replacements. This method guarantees compatibility and performance, streamlining the selection process. Referencing ANSI codes in Sylvania’s catalog provides a reliable way to find the correct lamp for any fixture or application. Visit Sylvania’s official website for detailed ANSI code listings and cross reference data.

Finding the Correct Replacement Lamp

Finding the right replacement lamp involves checking the owner’s manual, using online cross reference tools, and consulting experts. Sylvania’s guide simplifies this process for accuracy and convenience.

6.1 Checking the Owner’s Manual

Consulting the owner’s manual is the first step in identifying the correct replacement lamp. It provides specific bulb type, wattage, and voltage details. This ensures compatibility and optimal performance. For vehicles, the manual lists bulb specifications by location, while for fixtures, it outlines lamp requirements. Referencing this guide helps avoid mismatches and ensures safety. Always verify the information with Sylvania’s cross reference guide for accuracy.

6.2 Using Online Cross Reference Tools

Online cross reference tools simplify finding the right lamp by allowing users to input vehicle or fixture details. These tools provide precise compatibility results, ensuring the correct bulb is selected. They often include filters for wattage, voltage, and bulb type, making the search process efficient. Many platforms, like Sylvania’s official website or LightBulbs.com, offer detailed product comparisons and quick access to specifications. These tools are regularly updated, ensuring users have access to the latest lamp options and advancements in lighting technology.

6.3 Consulting with Retail Experts

Consulting with retail experts is a reliable way to ensure accurate lamp replacements. These professionals have extensive knowledge of Sylvania lamps and can guide users through the selection process. They often use cross reference guides and manufacturer data to recommend the best options. Retail experts can also address specific concerns, such as brightness preferences or energy efficiency needs. Their expertise helps users avoid mismatches and ensures compatibility, making the replacement process smooth and hassle-free. This personalized assistance is invaluable for those seeking precise solutions.

Sylvania Lamp Replacement Considerations

Consider brightness, color temperature, and energy efficiency. LED options offer longer lifespan and lower energy use. Check dimmability and fixture compatibility for optimal performance.

7.1 Brightness and Color Temperature

Brightness and color temperature are crucial factors in selecting Sylvania lamps. Brightness is measured in lumens, with higher values indicating greater light output. Color temperature, measured in Kelvin, determines the light’s color: lower Kelvin values (e.g., 2700K-3000K) produce warm, yellowish tones, while higher values (e.g., 5000K-6500K) emit cooler, bluish-white light. Sylvania’s SilverStar Ultra bulbs offer higher brightness for enhanced visibility, while SmartPlus LEDs provide adjustable color temperatures for tailored lighting needs, ensuring optimal performance for specific tasks or ambiance.

7.2 Energy Efficiency and Lifespan

Sylvania lamps vary in energy efficiency and lifespan, with LED options like SmartPlus offering significant energy savings and extended lifespans compared to traditional halogen bulbs. LED bulbs consume less power while maintaining brightness, reducing long-term energy costs. Halogen bulbs, such as SilverStar Ultra, provide improved lifespan over standard halogens. The cross reference guide helps users identify energy-efficient options, ensuring they select lamps that balance performance, cost, and environmental impact, aligning with their specific needs and preferences for sustainable lighting solutions.

7.4 Dimmability and Compatibility

Dimmability and compatibility are crucial when selecting Sylvania lamps, especially for smart lighting systems. LED bulbs like SmartPlus are designed to be dimmable, ensuring seamless integration with smart home systems. Compatibility with existing fixtures and dimmers is verified through the cross reference guide, which highlights compatible products. This ensures users achieve optimal lighting control without compromising performance, making it easier to enhance their lighting setup with advanced features while maintaining functionality and energy efficiency across various applications.

Popular Sylvania Lamp Product Lines

Sylvania offers iconic product lines like SilverStar Ultra, XtraVision, and SmartPlus LED, each designed for superior performance, brightness, and energy efficiency, catering to diverse lighting needs and preferences.

8.1 SilverStar Ultra Headlight Bulbs

Sylvania’s SilverStar Ultra headlight bulbs deliver superior nighttime visibility with a cooler, whiter light for enhanced clarity. Designed to help drivers see farther down the road, they improve safety and confidence while maintaining a bright, crisp illumination. These bulbs are engineered to provide optimal performance, making them a top choice for motorists seeking reliable and advanced lighting solutions. Their enhanced design ensures compatibility with various vehicle types, offering a seamless upgrade for drivers looking to enhance their driving experience.

8.2 XtraVision Halogen Bulbs

Sylvania’s XtraVision Halogen Bulbs are a popular choice for drivers seeking enhanced visibility. These bulbs provide brighter light on the roadway, improving safety without causing glare for oncoming drivers. Designed for reliable performance, they are ideal for motorists who desire improved illumination for nighttime driving. As part of Sylvania’s automotive lighting range, XtraVision bulbs offer a balance of brightness and safety, making them a trusted option for upgrading your vehicle’s lighting system.

8.3 SmartPlus LED Bulbs

Sylvania’s SmartPlus LED Bulbs offer advanced lighting solutions with features like Bluetooth Mesh technology for seamless smart home integration. These bulbs provide full-color RGBW options and adjustable white tones, allowing users to customize lighting environments effortlessly. Compatible with popular smart home systems, SmartPlus LEDs combine energy efficiency with innovative control. Their long lifespan and dimmability make them a versatile choice for modern lighting needs, enhancing both functionality and ambiance in residential settings while maintaining Sylvania’s reputation for quality and performance.

LED vs. Traditional Sylvania Lamps

LED lamps offer superior energy efficiency, longer lifespan, and smart features, while traditional lamps provide reliable performance at a lower cost, catering to different lighting needs and preferences.

9.1 Benefits of LED Technology

LED technology offers significant advantages, including energy efficiency, longer lifespan, and reduced maintenance. LEDs consume up to 90% less energy than traditional lamps while providing brighter, whiter light. They are also dimmable and compatible with smart home systems, enhancing convenience and customization. Additionally, LEDs are eco-friendly, containing no toxic materials like mercury. Their durability and resistance to vibration make them ideal for automotive and industrial applications, ensuring reliable performance over time. These benefits make LED lamps a superior choice for modern lighting needs.

9.2 Differences in Performance and Cost

LED lamps outperform traditional halogen bulbs in brightness, lifespan, and energy efficiency, yet are more expensive upfront. Halogens are cost-effective for short-term use but lack the longevity and efficiency of LEDs. Sylvania’s SilverStar Ultra halogens offer improved visibility, while SmartPlus LEDs provide long-term savings and advanced features like dimming. Balancing performance and budget, LED options justify higher costs through lower energy consumption and extended lifespan, making them a worthwhile investment for those seeking sustainable lighting solutions.

Cost Considerations and Budget Options

Sylvania offers a range of options to fit every budget, from affordable halogen bulbs to mid-range LED solutions and premium smart lighting for enhanced functionality and efficiency.

10.1 Affordable Halogen Options

Sylvania offers budget-friendly halogen options like SilverStar and XtraVision, providing excellent brightness and reliability without high costs. These bulbs are ideal for automotive and household use, offering a balance between affordability and performance. With a wide range of applications, Sylvania’s halogen lamps ensure cost-effective lighting solutions while maintaining quality and durability. They are a practical choice for those seeking efficient illumination without exceeding their budget, making them a preferred option for everyday lighting needs.

10.2 Mid-Range LED Solutions

Sylvania’s mid-range LED solutions offer enhanced energy efficiency and longer lifespan compared to traditional halogens. Products like the SmartPlus LED bulbs provide excellent value, combining affordability with advanced features such as dimmability and smart compatibility. These LEDs are designed to deliver consistent performance while reducing energy consumption, making them a popular choice for homeowners and businesses seeking cost-effective, eco-friendly lighting solutions that balance quality and affordability.

10.3 Premium Smart Lighting Options

Sylvania’s premium smart lighting options, such as the SmartPlus LED bulbs, offer advanced features like RGB color changing and voice control through Alexa. These bulbs provide superior brightness and color accuracy, enhancing home ambiance. With energy-efficient technology and long lifespans, they are ideal for smart home setups, ensuring seamless integration and convenience while maintaining high performance and eco-friendliness, making them a top choice for those seeking cutting-edge lighting solutions.

Energy Efficiency and Environmental Impact

Sylvania lamps prioritize energy efficiency, with LED options reducing power consumption. Eco-friendly designs and responsible disposal programs highlight their commitment to minimizing environmental impact while enhancing performance.

11.1 Energy Star Ratings

Sylvania lamps with Energy Star ratings ensure energy efficiency, reducing consumption and costs. LED and CFL options meet strict standards, offering bright, eco-friendly lighting solutions while promoting sustainability. These lamps are designed to minimize environmental impact, aligning with energy-saving goals and supporting eco-conscious choices for homes and businesses. Energy Star certification guarantees superior performance and efficiency, making Sylvania a trusted choice for environmentally responsible lighting solutions.

11.2 Eco-Friendly Disposal Options

Sylvania encourages responsible disposal of lamps to minimize environmental impact. Many communities offer recycling programs for CFLs and LEDs, ensuring hazardous materials like mercury are safely managed. Retailers often provide drop-off services for used bulbs, while online resources guide proper disposal methods. Proper handling prevents contamination and supports eco-friendly practices, aligning with sustainability goals and reducing waste effectively. Always check local guidelines for specific disposal instructions to ensure environmental safety.

Maintenance and Care Tips

Proper handling and installation ensure Sylvania lamps perform optimally. Avoid touching glass bulbs with bare hands, and always follow the owner’s manual for safe, correct installation.

12.1 Proper Handling and Installation

Proper handling and installation are crucial for ensuring Sylvania lamps function optimally. Always wear gloves when handling bulbs to prevent oil residue from skin, which can cause premature burnout. Clean lamps with a soft cloth and avoid harsh chemicals. Follow the manufacturer’s instructions for installation, ensuring correct base alignment and secure connections. Refer to the owner’s manual for specific guidance tailored to your lamp type and application. Proper installation ensures safety, efficiency, and longevity of your Sylvania lamps.

12.2 Cleaning and Storage Guidelines

Proper cleaning and storage ensure longevity and performance of Sylvania lamps. Use a soft, dry cloth to wipe bulbs, avoiding harsh chemicals or abrasive materials. Store lamps in their original packaging or protective cases to prevent damage. Keep bulbs in a cool, dry place, away from direct sunlight and moisture. Avoid extreme temperatures, as this can affect lamp performance. Always refer to the owner’s manual for specific cleaning and storage recommendations tailored to your lamp type.

Troubleshooting Common Issues

This section addresses common issues like flickering, dimming, or premature burnout, offering solutions and tips for troubleshooting Sylvania lamps effectively.

13.1 Flickering or Dimming Lamps

Flickering or dimming lamps can indicate issues like loose connections, voltage fluctuations, or incompatible dimmer switches. Ensure the lamp is tightly secured and matches the fixture’s voltage. Check for faulty ballasts or drivers, especially in LED lamps. Verify compatibility with smart home systems or dimmers. Refer to the owner’s manual for troubleshooting guides or consult Sylvania’s support for tailored solutions. Proper installation and compatibility checks can resolve most issues effectively.

13.2 Premature Burnout Causes

Premature burnout of Sylvania lamps can stem from voltage fluctuations, improper installation, or exceeding recommended wattage. Overheating due to poor ventilation or high ambient temperatures accelerates degradation. Using mismatched dimmers or incompatible fixtures may also cause premature failure. Inspect connections for looseness and ensure lamps are operated within specified voltage and temperature ranges. Always refer to the product manual for guidelines to prevent early burnout and extend lamp lifespan effectively.

The Sylvania Lamp Cross Reference Guide simplifies finding the right replacement, ensuring compatibility and efficiency. It underscores the importance of proper selection for optimal lighting performance and longevity.

14.1 Summary of Key Points

The Sylvania Lamp Cross Reference Guide is an essential tool for identifying compatible lamps, ensuring optimal performance and energy efficiency. It covers automotive, household, and specialty lamps, providing detailed cross-references by base type, wattage, and ANSI codes. The guide emphasizes the importance of LED technology for energy savings and longevity. By considering brightness, color temperature, and dimmability, users can make informed decisions. Troubleshooting common issues and proper maintenance tips are also highlighted for extended lamp life and reliability.

14.2 Final Tips for Effective Cross Referencing

Always refer to the Sylvania Cross Reference Guide for accurate lamp replacements. Consult your vehicle’s or fixture’s manual for specific bulb requirements; Use online tools like Sylvania’s Bulb Finder for quick searches. Verify bulb base type and wattage for compatibility. Consider upgrading to LED for energy efficiency and longevity. Check reviews and expert recommendations to ensure optimal performance; By following these steps, you can confidently find the right lamp for your needs, avoiding costly mistakes and ensuring safety.

the leadership challenge pdf free download

The Leadership Challenge by Jim Kouzes and Barry Posner is a timeless guide to exemplary leadership, offering practical advice and real-world insights. Available as a free PDF download, it outlines essential practices for leaders to inspire and empower teams, fostering collaboration and integrity. This book remains a must-read for anyone seeking to enhance their leadership skills and create forward momentum in their organizations.

Overview of the Book

The Leadership Challenge by Jim Kouzes and Barry Posner is a renowned guide to developing exemplary leadership skills. Now in its sixth edition, the book provides a comprehensive framework for leaders to inspire, motivate, and empower their teams. It introduces the Five Practices of Exemplary Leadership, which include modeling the way, inspiring a shared vision, challenging the process, enabling others to act, and encouraging the heart. These practices are supported by extensive research and real-world case studies, offering practical advice for leaders at all levels. The book emphasizes the importance of credibility, emotional intelligence, and collaboration, making it a valuable resource for both emerging and experienced leaders. Available as a free PDF download, The Leadership Challenge is a must-read for anyone seeking to enhance their leadership abilities and create a positive impact within their organizations.

Importance of Leadership in Modern Organizations

Effective leadership is pivotal in modern organizations, driving growth, innovation, and sustainability. Leaders set the vision, inspire teams, and navigate complexities in today’s fast-paced world. According to The Leadership Challenge, leadership is not confined to top-tier executives but is everyone’s responsibility. It fosters collaboration, empowers individuals, and builds trust, essential for organizational success. The book highlights how leaders must adapt, communicate effectively, and maintain integrity to thrive. By emphasizing these qualities, The Leadership Challenge underscores the critical role of leadership in aligning teams with organizational goals and creating a culture of excellence. Available as a free PDF download, it equips leaders with practical tools to address challenges and inspire collective action, ensuring their organizations remain competitive and resilient in an ever-changing landscape.

Key Concepts of The Leadership Challenge

The Leadership Challenge outlines five exemplary practices, emphasizing credibility and inclusivity, providing a framework for effective leadership accessible to everyone.

The Five Practices of Exemplary Leadership

The Five Practices of Exemplary Leadership, as outlined in The Leadership Challenge, serve as a foundation for effective leadership. These practices include Modeling the Way, Inspiring a Shared Vision, Challenging the Process, Enabling Others to Act, and Encouraging the Heart. Each practice is designed to guide leaders in fostering collaboration, driving innovation, and empowering teams. By following these principles, leaders can transform values into actions, envision the future, and recognize contributions, ultimately creating a culture of trust and accountability. These practices are not only practical but also adaptable, making them essential for leaders at all levels to achieve organizational success and inspire their teams to reach their full potential.

Credibility: The Foundation of Leadership

Credibility is the bedrock of effective leadership, as emphasized in The Leadership Challenge. It is the qualities of trust, consistency, and ethical behavior that make leaders believable and worthy of loyalty. When leaders act in alignment with their values and maintain transparency, they build trust with their teams. Credibility is not just about being likable but about demonstrating competence and reliability. Leaders who consistently follow through on their commitments create a culture of dependability. Without credibility, even the most visionary ideas and strategies fail to resonate. The book highlights that if people doubt the leader, they will doubt the message, making credibility indispensable for inspiring and motivating others. By fostering trust and integrity, leaders establish a solid foundation for achieving their goals and driving organizational success.

Modeling the Way: Setting the Example

Modeling the way is a fundamental practice of exemplary leadership, as outlined in The Leadership Challenge. Leaders set the example by aligning their actions with the organization’s values and beliefs, demonstrating what is expected. This practice emphasizes the importance of leaders going first and showing others how to behave. By finding their voice and clearly communicating their beliefs, leaders inspire trust and clarity. Consistency in words and actions builds credibility and fosters a culture of accountability. Leaders who model the way encourage others to follow their lead, creating a shared commitment to organizational goals. This practice is about leading by example, ensuring that actions reflect the values and vision of the team. It is through modeling the way that leaders establish a foundation of trust and integrity, essential for effective leadership and organizational success.

Inspiring a Shared Vision: Envisioning the Future

Inspiring a shared vision is a critical aspect of leadership, as emphasized in The Leadership Challenge. Leaders must envision the future and communicate this vision in a way that resonates with others. By painting a vivid picture of what could be, leaders inspire commitment and motivation in their teams. This practice involves not only creating a compelling vision but also enlisting others to join in its pursuit. Leaders who inspire a shared vision encourage collaboration and alignment toward common goals. They challenge the status quo and seek opportunities for innovation, fostering an environment where everyone feels connected to the organization’s purpose. Through this practice, leaders transform individual aspirations into collective achievements, driving the organization toward a brighter future. Visionary leadership is essential for sustaining momentum and overcoming challenges, making this practice a cornerstone of successful leadership.

Challenging the Process: Seeking Opportunities

Challenging the process is a fundamental practice of exemplary leadership, as highlighted in The Leadership Challenge. Leaders must be willing to question the status quo and seek out innovative opportunities for growth; This involves taking calculated risks, experimenting with new approaches, and encouraging others to do the same. By challenging the process, leaders can uncover fresh solutions to persistent problems and drive continuous improvement. This practice fosters a culture of adaptability and resilience, enabling organizations to stay competitive in an ever-changing environment. Leaders who embrace this mindset inspire their teams to think creatively and view challenges as opportunities for development. Ultimately, challenging the process is about leading with a forward-thinking perspective, ensuring that the organization remains nimble and poised for success. This practice is essential for driving meaningful change and achieving extraordinary results. Visionary leaders know that complacency is the enemy of progress.

Enabling Others to Act: Empowering Teams

Empowering teams is at the heart of effective leadership, as emphasized in The Leadership Challenge. Leaders who enable others to act foster collaboration and strengthen team members’ capabilities. This involves sharing power, providing the necessary resources, and creating an environment of trust and accountability. By empowering others, leaders unlock their team’s full potential, driving innovation and productivity. This practice ensures that individuals feel valued and motivated, leading to greater commitment and engagement. Leaders who prioritize empowerment understand that their role is not to control but to facilitate growth and shared success. The free PDF download of The Leadership Challenge offers practical strategies for leaders to create a supportive and enabling work culture, enabling teams to thrive and achieve exceptional results. Empowering others is a cornerstone of exemplary leadership, essential for building strong, cohesive, and high-performing teams.

Encouraging the Heart: Recognizing Contributions

Recognizing and celebrating team members’ contributions is vital for fostering motivation and loyalty. The Leadership Challenge emphasizes that encouraging the heart strengthens relationships and reinforces shared values. Leaders who acknowledge efforts and achievements create a positive work environment, boosting morale and productivity. This practice involves more than just rewards; it’s about genuine appreciation and connection. By celebrating milestones and successes, leaders affirm their commitment to their team’s well-being and success. The free PDF download of The Leadership Challenge provides insights and practical strategies for leaders to effectively recognize contributions, ensuring individuals feel valued and inspired. This approach not only enhances individual performance but also builds a culture of gratitude and shared purpose, essential for sustaining long-term success and engagement within organizations. Encouraging the heart is a powerful way to nurture a motivated and committed team.

Practical Applications of The Leadership Challenge

The Leadership Challenge offers actionable strategies for leaders, emphasizing emotional intelligence, effective communication, and fostering collaboration. The free PDF download provides tools for empowering teams and driving organizational success through integrity and adaptability.

Leadership is Everyone’s Business

Leadership is Everyone’s Business emphasizes that leadership is not restricted to formal roles but is a responsibility for all individuals. The free PDF download of The Leadership Challenge highlights how every person can contribute to organizational success by taking initiative and inspiring others. This concept fosters a culture of shared accountability, where everyone, regardless of position, can lead by example. By encouraging individuals to embrace leadership, organizations cultivate a workforce that is proactive, collaborative, and committed to achieving common goals. This approach not only empowers employees but also drives innovation and growth, ensuring that leadership becomes a collective effort rather than a top-down directive. The book provides practical strategies to help individuals at all levels develop their leadership potential and make a meaningful impact.

The Role of Emotional Intelligence in Leadership

Emotional intelligence (EI) is a cornerstone of effective leadership, as highlighted in The Leadership Challenge. The free PDF download emphasizes how leaders with high EI can better understand and manage their own emotions, as well as those of their team members. This ability fosters empathy, builds trust, and enhances communication. Leaders with strong EI are adept at resolving conflicts, motivating others, and creating a positive work environment. By mastering self-awareness, self-regulation, and social skills, leaders can inspire and empower their teams to achieve exceptional results. The book underscores that emotional intelligence is not innate but can be developed through practice and reflection, making it accessible to all aspiring leaders. This concept is central to the practical applications of leadership growth discussed in the guide.

Effective Communication Skills for Leaders

Effective communication is a critical skill for leaders, as emphasized in The Leadership Challenge. The free PDF download highlights how clear and consistent communication enables leaders to inspire and align their teams. Leaders must articulate their vision and ideas persuasively, ensuring clarity and purpose. Active listening, transparency, and approachability are essential for fostering trust and collaboration. Communication also involves non-verbal cues, such as body language and tone, which convey confidence and empathy. By mastering these skills, leaders can bridge gaps, resolve conflicts, and drive organizational success. The book underscores that effective communication is not just about speaking but also about understanding and being understood. This ability to connect deeply with others is vital for building strong relationships and achieving shared goals.

Fostering Collaboration and Teamwork

Fostering collaboration and teamwork is a cornerstone of effective leadership, as highlighted in The Leadership Challenge. The free PDF download emphasizes the importance of creating an environment where team members feel empowered, valued, and motivated to work together toward shared goals. Leaders must actively encourage open communication, mutual respect, and trust among team members. By fostering collaboration, leaders can leverage diverse perspectives, drive innovation, and enhance problem-solving capabilities. The book suggests that leaders should model collaborative behavior, recognize and reward teamwork, and provide opportunities for shared learning. When teams collaborate effectively, they achieve greater results and develop stronger relationships. The Leadership Challenge underscores that collaboration is not just a strategy but a mindset that leaders must cultivate to build high-performing teams and sustain organizational success over time.

Adaptability and Integrity in Leadership

Adaptability and integrity are essential qualities for modern leaders, as emphasized in The Leadership Challenge. Available as a free PDF download, the book highlights how leaders must remain agile in dynamic environments while maintaining unwavering ethical standards. Adaptability allows leaders to navigate change, embrace new opportunities, and guide their teams through uncertainty. Integrity, on the other hand, builds trust and credibility, ensuring that leaders act consistently with their values and principles. Together, these qualities foster a culture of resilience and moral accountability. The authors stress that leaders who adapt while staying true to their values inspire loyalty and drive long-term success. By prioritizing adaptability and integrity, leaders can lead with purpose and make a lasting impact on their organizations and people.

The Leadership Challenge Workbook

The Leadership Challenge Workbook is a practical step-by-step guide for leaders, offering reflections and actions to create forward momentum. Available as a free PDF, it helps leaders grow and inspire their teams effectively.

A Step-by-Step Guide to Leadership Development

The Leadership Challenge Workbook provides a structured approach to leadership growth, guiding individuals through reflective exercises and actionable steps. By focusing on incremental progress, it helps leaders develop the skills needed to inspire and empower their teams. The workbook emphasizes the importance of self-reflection, enabling leaders to identify their strengths and areas for improvement. It also encourages leaders to think beyond their personal agendas, fostering a mindset that aligns their efforts with the aspirations of their teams. With practical tools and real-world examples, this guide offers a comprehensive roadmap for leadership development, making it an invaluable resource for anyone seeking to enhance their leadership capabilities. The step-by-step format ensures that leaders can systematically work on each essential element of leadership, creating a lasting impact on their organizations. The workbook’s approach is designed to be adaptable, allowing leaders to apply its principles in various contexts, from strategic planning to everyday decision-making.

Reflecting on Essential Leadership Elements

The Leadership Challenge Workbook emphasizes the importance of reflection in leadership development, encouraging leaders to examine their beliefs, values, and actions. By reflecting on essential leadership elements, individuals can gain clarity on their leadership style and identify areas for growth. The workbook provides structured exercises to help leaders think critically about their experiences and align their actions with their aspirations. Reflection is key to understanding how to model the way, inspire a shared vision, and enable others to act. It also fosters a deeper understanding of credibility, the foundation of leadership, and how to maintain integrity in decision-making. Through reflective practices, leaders can bridge the gap between thinking and doing, ultimately creating a meaningful impact on their teams and organizations. This process of self-reflection is essential for sustained leadership growth and effectiveness.

Creating Forward Momentum in Leadership

Creating forward momentum is a core concept in The Leadership Challenge, emphasizing the need for leaders to drive progress and innovation. The workbook guides leaders to take incremental steps toward their goals, fostering a culture of continuous improvement. By envisioning the future and inspiring others, leaders can build collective enthusiasm and commitment. This approach encourages leaders to challenge the status quo, seek opportunities, and experiment with new ideas. Momentum is sustained through empowering others, fostering collaboration, and recognizing contributions. Leaders who successfully create forward momentum not only achieve organizational success but also inspire their teams to grow and excel. This mindset of proactive leadership ensures that organizations remain adaptable and resilient in an ever-changing world. By focusing on actionable steps, leaders can turn vision into reality and drive lasting impact.

Why The Leadership Challenge is a Must-Read

The Leadership Challenge is a must-read for its timeless wisdom, real-world case studies, and practical advice on leadership growth. Its insights are invaluable for modern leaders seeking to inspire and empower teams, making it an essential resource for anyone looking to enhance their leadership skills and drive organizational success.

Timeless Wisdom for Modern Leaders

The Leadership Challenge offers timeless wisdom that remains relevant in today’s fast-paced world. The book emphasizes core leadership principles such as credibility, vision, and empowerment, which are as essential now as when first introduced. By focusing on universal truths about human behavior and organizational dynamics, Kouzes and Posner provide guidance that transcends trends, making it a reliable resource for leaders across industries. The free PDF download ensures accessibility, allowing modern leaders to apply these enduring insights to contemporary challenges, fostering collaboration, innovation, and growth. This ensures that the principles outlined in The Leadership Challenge continue to inspire and equip leaders to meet the demands of an ever-evolving business landscape with integrity and effectiveness.

Real-World Case Studies and Research

The Leadership Challenge is enriched with real-world case studies and cutting-edge research, making it a robust resource for leaders. The fourth edition, in particular, features updated research and inspiring stories of individuals achieving remarkable results. These case studies provide practical insights into how leaders navigate challenges, innovate, and drive success across various industries. By grounding leadership principles in real-life scenarios, the book offers actionable lessons that leaders can apply immediately. The inclusion of diverse examples ensures that the content resonates with leaders at all levels, from aspiring managers to seasoned executives. This blend of research and storytelling makes The Leadership Challenge a credible and relatable guide for fostering growth and improving organizational outcomes, further solidifying its reputation as a must-read for leadership development. The free PDF download ensures accessibility to these valuable insights for leaders worldwide.

Practical Advice for Leadership Growth

The Leadership Challenge offers actionable strategies for fostering personal and professional growth, making it a valuable resource for leaders. The book emphasizes the importance of self-reflection, emotional intelligence, and clear communication. By focusing on the five practices of exemplary leadership, readers gain practical tools to enhance their skills. The free PDF download ensures accessibility, allowing leaders to explore these principles anywhere. With a strong emphasis on empowering teams and fostering collaboration, the book provides guidance on how to create an environment where individuals thrive. Its step-by-step approach, combined with real-world examples, makes it an indispensable guide for anyone aiming to improve their leadership abilities and drive success in their organizations. This practical advice ensures that leaders can apply these insights directly, leading to meaningful and lasting growth.

The Leadership Challenge by Kouzes and Posner is a transformative guide, offering timeless leadership wisdom. Its free PDF availability makes it accessible for all aspiring leaders, ensuring lasting impact.

The Impact of The Leadership Challenge on Leadership Development

The Leadership Challenge has profoundly influenced leadership development by providing a clear framework for effective leadership. Its emphasis on the Five Practices—Modeling the Way, Inspiring a Shared Vision, Challenging the Process, Enabling Others to Act, and Encouraging the Heart—has equipped leaders worldwide with practical tools. The book’s accessibility, including a free PDF download, has democratized leadership learning, allowing individuals at all levels to grow. With real-world case studies and updated research, it bridges theory and practice, fostering a culture of continuous improvement. The workbook companion further enhances its impact, offering a step-by-step guide for leaders to reflect, act, and create lasting change. This holistic approach ensures that The Leadership Challenge remains a cornerstone in leadership development, empowering individuals to lead with integrity and inspire others to achieve extraordinary results.

Final Thoughts on the Importance of Leadership

Leadership is the cornerstone of progress, driving individuals and organizations toward shared goals. The Leadership Challenge underscores that leadership is not confined to titles but is everyone’s responsibility. By fostering credibility, envisioning the future, and empowering others, leaders create lasting impact. The book’s insights, accessible via a free PDF download, emphasize that leadership is about inspiring and enabling others to achieve their best. Effective leadership requires emotional intelligence, adaptability, and integrity, fostering collaboration and innovation. As leaders grow, they transform not only their teams but also the broader community. The Leadership Challenge reminds us that leadership is a journey, not a destination, and its principles are essential for navigating today’s complex world, making it a timeless resource for anyone aspiring to lead with purpose and excellence.

t4 thermostat manual

The Honeywell Home T4 Pro Programmable Thermostat simplifies home heating and cooling management with a user-friendly interface, offering seven-day scheduling and adaptive recovery features for efficient operation.

1.1 Overview of the T4 Pro Programmable Thermostat

The Honeywell Home T4 Pro Programmable Thermostat is a sleek, user-friendly device designed to simplify home heating and cooling management. Part of Honeywell’s T Series, it offers a straightforward interface with push-button controls and a backlit screen for easy navigation. The thermostat includes a UWP mounting system, decorative cover plate, and two AA batteries for operation. Compatible with most HVAC systems, it does not require a C-wire for power, making installation versatile. The T4 Pro features a 7-day programmable schedule, allowing users to set different temperatures for weekdays and weekends. Its adaptive recovery feature ensures the system reaches the desired temperature at the scheduled time. The thermostat also includes a filter reminder and energy-saving modes, making it a practical choice for homeowners seeking efficiency and comfort.

1.2 Key Features of the T4 Thermostat

The T4 Thermostat offers a range of features designed for convenience and efficiency. It includes a programmable schedule for up to seven days, allowing users to set different temperatures for weekdays and weekends. The adaptive recovery feature ensures the system reaches the desired temperature at the scheduled time. Geofencing capabilities enable automatic temperature adjustments based on your location, while the filter reminder alerts you when the air filter needs replacement. Energy-saving programming tips help optimize temperature settings, and the thermostat supports smart home integrations for enhanced control. Compatible with most HVAC systems, the T4 also features a backlit screen and battery operation with optional C-wire support, making it versatile for various installations.

1.3 Importance of Proper Installation and Programming

Proper installation and programming of the T4 Thermostat are crucial for optimal performance and energy efficiency. Incorrect installation can lead to system malfunctions, increased energy bills, and reduced equipment lifespan. Programming the thermostat correctly ensures it operates according to your schedule, maintaining comfort while saving energy. Improper settings may result in inconsistent temperatures or failed adaptive recovery, diminishing efficiency. Following the user manual’s guidelines ensures compatibility with your HVAC system and prevents issues like incorrect wiring or feature activation. Regular checks and updates to the programming maintain peak performance, ensuring the thermostat adapts to your lifestyle and environmental changes effectively. Proper setup is essential for maximizing the T4’s benefits and reliability.

Installation Requirements and Preparations

Ensure compatibility with your HVAC system, gather tools like a screwdriver, and use the included J-box adapter for proper mounting. Always turn off power and follow the manual.

2.1 Compatibility with HVAC Systems

The T4 Pro Programmable Thermostat is compatible with most conventional HVAC systems, including gas, oil, and electric furnaces, as well as heat pumps and dual-fuel systems. It supports 2-stage heating and cooling systems, ensuring optimal performance across various setups. The thermostat is designed to work with 24V systems and requires a C-wire for continuous power, especially if not using a battery-powered option. Compatibility with smart home systems like Honeywell Home can enhance its functionality. Always verify system compatibility before installation to ensure smooth operation and avoid potential issues. Proper pairing with your HVAC system ensures efficient temperature control and energy savings.

2.2 Tools and Materials Needed for Installation

For installing the T4 Pro Programmable Thermostat, you’ll need a screwdriver, drill, and wall anchors. The thermostat package includes a mounting system, J-box adapter, decorative cover plate, screws, and 2 AA batteries. Ensure you have a C-wire for continuous power if not using battery power. Additional tools like wire strippers and a voltage tester may be helpful for wiring connections. Refer to the installation guide for specific requirements. Proper preparation ensures a smooth setup process and optimal thermostat performance. Always follow safety guidelines when handling electrical components.

2.3 Step-by-Step Installation Process

Turn off power to your HVAC system at the circuit breaker.

Remove the old thermostat and label the wires for identification.

Mount the T4 Pro base using the included UWP mounting system.

Connect the labeled wires to the corresponding terminals on the new thermostat.

Secure the thermostat to the mounting system.

Use the J-box adapter if necessary for compatibility.

Insert the batteries or connect the C-wire for power.

Turn the power back on and test the thermostat functionality.

Ensure all connections are secure and follow the user manual for specific wiring instructions. Proper installation ensures reliable performance and safety.

2.4 Wiring Diagrams and Connections

The T4 Pro Thermostat requires precise wiring connections to ensure proper functionality. Refer to the wiring diagram in the manual for specific terminal assignments. Typically, wires are connected as follows:

– R: Power from the transformer.

– W: Heating stage (usually white or orange wires).

– Y: Cooling stage (typically yellow wires).

– G: Fan control (green wire).

– C: Common wire (required for continuous power).

Use the included J-box adapter if your system lacks a C-wire. Ensure all connections are secure and match the diagram. Incorrect wiring can damage the thermostat or HVAC system. Always verify compatibility with your specific HVAC configuration before proceeding.

2.5 Post-Installation Checks and Tests

After installation, perform several checks to ensure the T4 Pro Thermostat functions correctly. First, verify that the screen lights up and responds to button presses. Check for a low battery indicator, which flashes when power is critically low. Test the heating and cooling modes by selecting them on the thermostat and confirming the HVAC system responds. Ensure the screen stays lit for 45 seconds after changes if using the C-wire. Review the wiring connections to confirm they match the diagram in the manual. Finally, run a test cycle to ensure the thermostat transitions between heating and cooling modes smoothly. If issues arise, consult the troubleshooting section or contact support.

Understanding the Thermostat Controls

The T4 Pro Thermostat features a user-friendly interface with buttons for navigating menus and adjusting settings. The screen displays temperature, mode, and system status, with indicators for low battery alerts and active modes.

3.1 Navigating the T4 Pro Thermostat Interface

The T4 Pro Thermostat interface is designed for ease of use. Press any button to wake the screen, which stays lit for 45 seconds when powered by a C wire. Use the up/down arrows to adjust temperature and left/right arrows to navigate menus. The “Select” button confirms choices. The interface displays current temperature, setpoint, and system mode (heat/cool). Battery life and mode indicators are visible. Access programming by pressing the right arrow after setting the time, where “PROG” appears. Regularly check indicators for low battery or system status. Press “Back” to return to previous screens, ensuring smooth navigation through settings and options.

3.2 Button Functions and Layout

The T4 Pro Thermostat features a straightforward button layout. The up and down arrows adjust temperature. The left and right arrows navigate menus. The “Select” button confirms settings, while “Back” returns to previous screens. The interface wakes with any button press, staying lit for 45 seconds. Battery status and system mode are displayed. The filter reminder alerts after set days or runtime. Adaptive recovery and geofencing enhance efficiency. Buttons are clearly labeled, making navigation intuitive. Regular use ensures familiarity with functions, optimizing thermostat performance and energy savings. Proper button operation is essential for programming and daily use, ensuring comfort and efficiency in heating and cooling management.

3.3 Screen Display and Indicators

The T4 Pro Thermostat features a clear LCD screen displaying current temperature, setpoint, and system mode (heating, cooling, or fan). Indicators include a low battery warning, which flashes when power is critically low, and icons for system status. The screen also shows the filter reminder, based on calendar days or runtime. When powered by the C wire, the display stays lit for 45 seconds after changes. The interface provides real-time feedback, ensuring users can monitor and adjust settings easily; The screen’s brightness and clarity enhance usability, making it simple to navigate and understand thermostat operations at a glance.

3.4 Adaptive Recovery and Geofencing Features

The T4 Pro Thermostat includes adaptive recovery, which learns your system’s behavior to reach the desired temperature by the scheduled time. This feature ensures consistent comfort while optimizing energy use. Additionally, the thermostat supports geofencing, using your smartphone’s location to adjust settings automatically. When you leave home, it switches to an energy-saving mode, and when you return, it restores your preferred temperature. These smart features work together to enhance convenience, reduce energy waste, and maintain a comfortable home environment seamlessly. They adapt to your lifestyle, providing efficient and intuitive temperature control without manual adjustments.

Programming the T4 Thermostat

Programming the T4 thermostat involves setting a weekly schedule, adjusting temperatures for different days, and using energy-saving features like geofencing and adaptive recovery to optimize comfort and efficiency.

4.1 Setting Up a Weekly Schedule

Setting up a weekly schedule on the T4 thermostat allows you to customize temperature settings for each day of the week. Start by pressing the “Menu” button and navigating to the programming section. Use the arrows to select the desired day and time, then adjust the temperature settings to your preference. For weekends, you can choose a separate schedule if needed. Once your settings are configured, press “Save” to lock them in. The T4’s interface is user-friendly, ensuring a smooth setup process. This feature helps maintain consistent comfort while optimizing energy usage. Regularly review and update your schedule to match lifestyle changes for maximum efficiency.

4.2 Adjusting Temperature Settings for Different Days

Adjusting temperature settings for different days on the T4 thermostat is straightforward. Use the arrow buttons to navigate to the desired day and time. Select the temperature setting you wish to modify, then press “Select” to adjust the value. For example, you can set a lower temperature for weekdays when no one is home and a higher temperature for weekends. The thermostat allows you to customize settings for each day, ensuring comfort and energy efficiency. After making changes, press “Save” to confirm. This feature provides flexibility to tailor your heating and cooling needs according to your daily schedule, optimizing both comfort and energy usage.

4.3 How to Override Scheduled Settings

To override scheduled settings on the T4 thermostat, press the arrow buttons to navigate to the current day’s schedule. Select the temperature setting you wish to change and press “Select.” Use the arrows to adjust the temperature to your desired level. Once set, press “Hold” to override the schedule temporarily. The override will remain active until the next scheduled period begins. This feature allows you to make quick adjustments without altering your weekly programming. The thermostat will revert to the programmed schedule automatically at the next set time, ensuring your custom settings are maintained while providing flexibility for unexpected changes.

4.4 Energy-Saving Programming Tips

Maximize energy savings with the T4 thermostat by utilizing its advanced features. Program a weekly schedule that aligns with your daily routine, lowering temperatures during sleep or when the house is empty. Use the adaptive recovery feature to gradually adjust temperatures, reducing energy waste. Enable geofencing to automatically adjust settings based on your location. Set temperature ranges within energy-efficient parameters, such as 68°F for heating and 78°F for cooling. Regularly review and adjust your schedule to reflect changes in your lifestyle. Consider using the filter reminder to maintain system efficiency, as a clean filter improves airflow and reduces energy consumption. These strategies help optimize comfort while lowering utility bills.

Maintenance and Troubleshooting

Regularly clean the thermostat screen and ensure proper wiring connections. Replace batteries when low battery alerts appear. Check for faulty temperature sensors and ensure accurate readings.

5.1 Cleaning and Maintaining the Thermostat

Regular maintenance ensures optimal performance. Turn off power before cleaning. Use a soft cloth to wipe the screen and exterior. Avoid harsh chemicals or abrasive materials. Check wiring connections for security and integrity. Replace batteries promptly when low battery alerts appear. Ensure the thermostat is free from dust and debris for accurate temperature readings. Periodically inspect the heat anticipator and adjust if necessary. Clean the device gently to prevent damage to the display or internal components. Proper upkeep extends the lifespan and reliability of the thermostat, ensuring precise temperature control and energy efficiency.

5.2 Replacing Batteries and Managing Power

The T4 Pro Thermostat operates on two AA batteries, ensuring continuous operation during power outages. Check the display for low battery alerts, indicated by a flashing symbol. Replace batteries promptly with high-quality alkaline cells to maintain functionality. Open the battery compartment located on the rear or side, depending on the model. Insert new batteries following the polarity markings. After replacement, the thermostat will retain programming and settings; If wired (C-wire), the screen remains lit for 45 seconds after changes. Ensure batteries are fresh to avoid data loss or system malfunctions. Regular battery maintenance guarantees reliable performance and consistent temperature control in your home. Always use the correct battery type for optimal results.

5.3 Common Issues and Diagnostic Tips

Common issues with the T4 Pro Thermostat include unresponsive screens, inaccurate temperature readings, or system malfunctions. If the screen is unresponsive, check for low battery levels or loose connections. For temperature inaccuracies, ensure the thermostat is properly calibrated and free from drafts. If the system fails to heat or cool, verify wiring connections and ensure the HVAC system is compatible. Resetting the thermostat to factory settings often resolves software-related issues. Always refer to the user manual for detailed diagnostic steps. Regular maintenance, such as cleaning the thermostat and updating settings, can prevent many common problems and ensure optimal performance. Addressing issues promptly helps maintain comfort and energy efficiency.

5.4 Resetting the Thermostat to Factory Settings

To reset the T4 Pro Thermostat to factory settings, press and hold the “Menu” button for 5 seconds until “RESET” appears on the screen. Use the arrow keys to select “Factory Reset” and confirm by pressing “OK.” This will restore default settings, erasing all programmed schedules and preferences. After resetting, the thermostat will restart, and you’ll need to reconfigure basic settings like temperature units and time. Ensure your HVAC system compatibility and wiring connections are correct before reprogramming. This process is useful for resolving software issues or preparing the thermostat for a new installation. Always refer to the user manual for detailed instructions to avoid potential conflicts or errors.

Advanced Features and Customization

The T4 Pro offers advanced features like filter reminders, geofencing, and adaptive recovery, allowing for tailored comfort and energy efficiency while maintaining ease of use.

6.1 Using the Filter Reminder Feature

The T4 Pro Thermostat includes a filter reminder feature that alerts you when it’s time to replace your HVAC system’s air filter. This feature can be set based on either a calendar schedule or the actual runtime of your system, ensuring optimal performance and efficiency. To activate this feature, navigate to the settings menu, select “Filter Reminder,” and choose your preferred tracking method. The thermostat will notify you when the filter needs attention, helping to maintain indoor air quality and system efficiency. Regular filter changes can also help reduce energy consumption and extend the lifespan of your HVAC equipment.

6.2 Adjusting the Heat Anticipator

The heat anticipator on the T4 Pro Thermostat allows you to fine-tune the heating cycle for precise temperature control. Located inside the thermostat, it regulates when the heating system turns on and off to maintain the set temperature. To adjust the heat anticipator, remove the thermostat cover and use a screwdriver to move the lever left or right. Moving it left shortens the heating cycle, while moving it right extends it. This adjustment ensures consistent room temperature and prevents overheating or underheating. For optimal performance, adjust the anticipator based on your system’s response and consult the user manual for specific guidance. Proper calibration enhances comfort and efficiency.

6.3 Setting Up Smart Home Integrations

The T4 Pro Thermostat can integrate with smart home systems to enhance convenience and efficiency. To set up smart home integrations, ensure your thermostat is compatible with your smart home hub or system. Connect the thermostat to your hub following the manufacturer’s instructions. For Wi-Fi-enabled models, download and install the Honeywell Home app to link your thermostat to your smart home network. Ensure the thermostat has a stable wireless signal for seamless communication. Refer to the user manual for specific pairing instructions, as procedures may vary depending on your smart home system. Once connected, you can control the thermostat remotely, set scenes, or integrate with voice assistants for hands-free operation.

6.4 Customizing the Thermostat’s Sensitivity

The T4 Pro Thermostat allows users to customize its sensitivity to better suit their comfort needs. Adjust the heat anticipator to fine-tune how the thermostat responds to temperature changes. A shorter cycle time increases sensitivity, while a longer cycle time reduces it. Access this feature through the advanced settings menu. Use the +/- buttons to adjust the setting, ensuring optimal heating or cooling performance. Test the adjustments to find the ideal balance for your home. For precise calibration, refer to the user manual or manufacturer guidelines to avoid overcorrection, which could lead to inefficiency. Proper sensitivity customization enhances energy efficiency and comfort.

Manufacturer Support and Resources

Honeywell Home offers comprehensive support for the T4 Thermostat, including downloadable user manuals, customer service contact options, and online forums for troubleshooting and tips.

7.1 Accessing the Official User Manual

The official Honeywell Home T4 Pro Programmable Thermostat User Manual is readily available for download on the Honeywell Home website. It is provided in English, Spanish, and French, ensuring accessibility for a wide range of users. The manual includes detailed instructions for installation, programming, and troubleshooting, making it an essential resource for both new and experienced users. Key sections cover setting up a weekly schedule, adjusting temperature settings, and understanding adaptive recovery features. Users can also find information on maintaining the thermostat, replacing batteries, and diagnosing common issues. The manual is free to download and can be easily accessed by visiting the Honeywell Home website and navigating to the support section.

7.2 Contacting Honeywell Home Support

For assistance with the Honeywell Home T4 Pro Programmable Thermostat, users can contact Honeywell Home Support through their official website. The support section offers a variety of resources, including contact forms, phone numbers, and troubleshooting guides. Customers can also reach out via phone for direct assistance with installation, programming, or resolving issues. Additionally, the Honeywell Home website provides access to online communities and forums where users can share experiences and solutions. For specific models like the TH4110U2005 and TH4210U2002, detailed support information is available, ensuring comprehensive assistance for all T4 Pro users. This makes it easy to address any concerns promptly and effectively.

7.3 Online Communities and Forums for T4 Users

Online communities and forums dedicated to T4 users provide valuable platforms for sharing experiences, troubleshooting, and accessing tips. These forums, often hosted on Honeywell Home’s official website or independent HVAC forums, allow users to discuss installation challenges, programming tips, and energy-saving strategies. Many users share solutions for common issues, such as adaptive recovery settings or geofencing configurations. These communities also offer insights into optimizing the T4 Pro’s features, like filter reminders and heat anticipator adjustments. By engaging with these forums, users can gain practical advice and collaborate with others to enhance their thermostat’s performance and efficiency, ensuring a smoother and more personalized experience with the T4 Pro Programmable Thermostat.

superflo vst manual

The SuperFlo VST is a high-efficiency variable speed pump designed for pool owners seeking reliability and energy savings. Its Eco Select distinction highlights its environmental benefits, while the comprehensive manual ensures smooth installation, operation, and maintenance, making it a practical choice for modern pool systems.

Overview of the SuperFlo VST Variable Speed Pump

The SuperFlo VST is a variable speed pool pump designed for energy efficiency and durability. It features a Totally Enclosed Fan Cooled (TEFC) motor, ensuring reliable performance in various conditions. With variable speed settings, it allows for customization to meet specific pool needs, reducing energy consumption. The pump is compatible with external control systems, such as Pentair’s RS-485 communication, enabling advanced automation. Its preset speed functionality simplifies operation, while the Eco Select brand distinction underscores its commitment to environmental sustainability. This pump is a practical and eco-friendly solution for modern pool systems, offering both power and efficiency.

Importance of the SuperFlo VST Manual

The SuperFlo VST manual is essential for optimal pump operation and longevity. It provides detailed installation, programming, and maintenance instructions, ensuring users can maximize energy efficiency and performance. The manual also outlines safety precautions, reducing the risk of malfunctions or accidents. By following the guidelines, pool owners can customize speed settings, troubleshoot common issues, and perform routine upkeep. Accessing the manual through Pentair’s official website or QR code ensures users have the most accurate and updated information, making it an invaluable resource for both new and experienced users.

Safety Instructions and Warnings

Adhering to the SuperFlo VST safety instructions is crucial for preventing accidents. Ensure all warnings are followed, and only qualified professionals install the pump to maintain user safety.

General Safety Precautions

Always follow safety guidelines to prevent accidents. Ensure the SuperFlo VST is installed by a qualified professional. Before starting, open the manual air relief valve and ensure all system valves are in the open position. This allows water to flow freely, preventing pressure buildup. Read the manual thoroughly to understand operation and maintenance procedures. Adhere to Pentair’s safety protocols to ensure safe and efficient pump performance. Proper precautions will help avoid potential hazards and extend the pump’s lifespan.

Specific Warnings for Installation and Operation

Installers must follow all safety instructions to avoid hazards. Only use approved replacement parts and ensure all electrical connections meet local codes. Never operate the pump without proper priming, as this can cause damage. Keep flammable materials away and avoid over-tightening connections. Ensure the pump is properly grounded to prevent electrical shocks. Refer to the manual for specific warnings and guidelines to ensure safe and efficient operation. Failure to comply may result in system malfunction or safety risks. Always consult a professional if unsure about any installation or operational steps.

Installation Guidelines

The SuperFlo VST installation involves pre-installation checks, a step-by-step guide, and post-installation testing. Ensure compliance with safety standards, and consult the manual or a professional if needed.

Pre-Installation Checks

Before installing the SuperFlo VST, ensure the site is prepared and safe. Verify electrical compatibility, plumbing connections, and system requirements. Inspect all components for damage. Ensure the pump matches pool specifications and local codes. Check for proper ventilation and clearances. Refer to the manual for detailed compatibility checks. Ensure the filter and valves are correctly configured. Verify the manual air relief valve is open to relieve pressure. Consult a qualified installer if unsure. These steps ensure a smooth and safe installation process, avoiding potential issues down the line.

Step-by-Step Installation Process

Mount the SuperFlo VST on a level, stable surface, ensuring proper drainage. Connect electrical lines to the terminal box, following local codes and manual instructions. Secure all plumbing connections tightly to avoid leaks. Open the manual air relief valve to relieve system pressure. Set the correct voltage and install external controls if required. Test the pump at low speed to ensure proper operation. Allow the system to run briefly before full operation. Refer to the manual for specific torque values and wiring diagrams. Follow these steps carefully to ensure safe and efficient installation of the SuperFlo VST pump.

Post-Installation Testing

After installation, prime the pump by opening the manual air relief valve to release trapped air. Run the pump at a low preset speed to ensure smooth operation. Check for leaks at all connections and verify proper voltage supply. Monitor the system pressure gauge to ensure it falls within the recommended range. Test all programmed speeds to confirm functionality. Inspect the motor for unusual noise or vibration. Finally, ensure the control panel displays correct operational data. Proper post-installation testing ensures the SuperFlo VST operates efficiently and safely, maximizing its energy-saving capabilities and extending its lifespan.

Operating the SuperFlo VST

Operating the SuperFlo VST is straightforward, with its user-friendly control panel allowing easy adjustment of preset speeds and real-time monitoring of system performance, ensuring optimal efficiency and reliability.

Understanding the Control Panel

The SuperFlo VST control panel is designed for intuitive operation, featuring a keypad and LCD display. It allows users to adjust preset speeds, monitor real-time performance, and access diagnostic tools. The keypad enables easy navigation through menus, while the display provides clear feedback on current settings and system status; This user-friendly interface ensures precise control over pump operation, making it easy to optimize energy efficiency and maintain optimal pool conditions. Regular use of the control panel helps in troubleshooting and ensuring the pump runs smoothly, aligning with the manual’s guidance for effective system management.

Setting Up Preset Speeds

Setting up preset speeds on the SuperFlo VST is a straightforward process that enhances energy efficiency and customizes pump operation. Users can program multiple speed settings to suit different pool operations, such as filtration, cleaning, or water features. The control panel allows easy navigation to the preset menu, where speeds can be adjusted and saved. This feature ensures optimal performance for various tasks while reducing energy consumption. By following the manual’s guidance, users can seamlessly configure and manage their preferred speed settings, ensuring the pump operates efficiently and effectively for all pool needs.

Monitoring Pump Performance

Monitoring the SuperFlo VST’s performance is essential for optimal operation. The control panel provides real-time data on speed, flow rates, and system pressure, allowing users to track efficiency. Regularly checking these metrics helps identify potential issues early. Performance curves in the manual guide users in assessing pump operation under various conditions. By observing these indicators, users can ensure the pump runs efficiently, maintain energy savings, and extend equipment lifespan. Additionally, monitoring allows for timely adjustments to preset speeds, ensuring the system operates within recommended parameters for reliable performance and minimal wear.

Programming the SuperFlo VST

Programming the SuperFlo VST is straightforward with the provided guide, allowing users to set custom speeds for efficient operation.

Basic Programming Steps

Programming the SuperFlo VST involves accessing the control panel to set custom speeds. Start by turning off the pump, then navigate to the programming menu. Select desired speeds for specific operations, ensuring optimal performance. Save settings to maintain consistency. Refer to the manual for detailed instructions to avoid errors. Always follow safety guidelines before initiating programming. This process ensures efficient operation tailored to your pool’s needs. Proper programming enhances energy savings and system longevity, making it a crucial step for owners. Consult the manual for troubleshooting tips if issues arise during setup. Ensure all settings align with your pool’s specifications for optimal functionality.

Advanced Programming Features

The SuperFlo VST offers advanced programming options for enhanced customization. Users can set multiple speed presets for different pool functions, such as filtration, cleaning, or water features. Customizable schedules allow automation of speed changes throughout the day, optimizing energy use. Remote control integration via compatible systems enables convenient adjustments. The manual provides detailed steps for configuring these features, ensuring precise control over pump operation. These advanced settings maximize efficiency, reduce noise, and extend equipment lifespan. Properly utilizing these features requires careful planning and adherence to the manual’s guidelines to achieve optimal performance tailored to specific pool needs.

Troubleshooting Common Programming Issues

Common programming issues with the SuperFlo VST often relate to keypad errors or system responsiveness. If the keypad is unresponsive, ensure proper power supply and check for loose connections. Resetting the pump system, as outlined in the manual, can resolve many software-related problems. Additionally, verifying programmed schedules and speed settings ensures they are correctly configured. If error codes appear, consult the manual for specific troubleshooting steps. Regular system updates and ensuring all components are properly synchronized can prevent programming issues. Always refer to the manual for detailed diagnostic guidance to restore optimal functionality quickly and effectively.

Maintenance and Upkeep

Regular maintenance ensures the SuperFlo VST operates efficiently. Schedule routine inspections, clean the pump basket, and inspect seals for wear. Replace worn parts promptly to maintain performance and longevity, as outlined in the manual for optimal results and energy efficiency.

Regular Maintenance Tasks

Regular maintenance is essential to ensure the SuperFlo VST operates efficiently and prolongs its lifespan. Start by cleaning the pump basket regularly to prevent debris buildup, which can restrict water flow. Inspect and replace worn or damaged seals to avoid leaks. Check the motor for signs of wear and ensure proper lubrication. Additionally, monitor the filter system and backwash as needed to maintain optimal performance. Refer to the manual for specific guidance on these tasks. Regular upkeep not only enhances efficiency but also supports the pump’s Eco Select energy-saving capabilities, ensuring it continues to deliver superior performance season after season.

Cleaning and Inspection Procedures

Regular cleaning and inspections are crucial for maintaining the SuperFlo VST’s performance. Start by turning off the power and relieving system pressure. Remove and clean the pump basket to ensure unobstructed water flow. Inspect the motor for dust or debris and clean as needed. Check the shaft seal for signs of wear or leaks. Lubricate moving parts if recommended. Additionally, inspect the pump housing for corrosion or damage. Always refer to the manual for specific cleaning instructions. Regular inspections help prevent malfunctions and ensure the pump operates efficiently, supporting its energy-saving features and prolonging its lifespan.

Replacing Wear and Tear Parts

Replacing wear and tear parts on the SuperFlo VST ensures optimal performance and longevity. Common parts to replace include the shaft seal, O-rings, and bearings. Always shut off power and relieve system pressure before starting. Use genuine Pentair replacement parts to maintain warranty and performance. Follow the manual’s detailed instructions for disassembly and reassembly. After replacing parts, test the system for leaks or unusual noise. Regular replacement of worn components prevents costly repairs and ensures the pump continues to operate efficiently, maintaining its energy-saving capabilities and Eco Select standards.

Troubleshooting Common Issues

Troubleshooting the SuperFlo VST involves identifying symptoms, checking power supply, and inspecting for blockages or worn parts. Refer to the manual for detailed diagnostic steps and solutions.

Identifying and Diagnosing Problems

Identifying issues with the SuperFlo VST begins with observing unusual noises, reduced flow rates, or error codes. Check the power supply, ensure proper installation, and inspect for blockages or leaks. Review the manual for troubleshooting charts to match symptoms with potential causes. Diagnostic steps may include testing electrical connections, verifying pump priming, and checking filter condition. Advanced issues might require consulting the manual’s detailed fault codes or contacting a professional. Regular system inspections and maintenance can prevent many common problems, ensuring optimal performance and longevity of the pump.

Resolving Pump Malfunctions

Resolving SuperFlo VST malfunctions involves addressing root causes promptly. Start by checking power supply and electrical connections. If error codes appear, refer to the manual for specific solutions. Clear blockages in the pump or filter, and ensure proper priming. For persistent issues, reset the system or replace worn parts like seals or bearings. Regular maintenance, such as cleaning the filter and inspecting electrical components, can prevent recurring problems. If issues persist, consult the troubleshooting guide or contact a certified technician for professional assistance to restore optimal performance.

Resetting the Pump System

Resetting the Pump System

To reset the SuperFlo VST pump system, first ensure the power is turned off at the circuit breaker. Allow the system to cool down for a few minutes. Open the manual air relief valve to relieve any residual pressure. Check for blockages in the suction or discharge lines and clear them if necessary. Once cleared, close the air relief valve and turn the power back on. Monitor the pump’s operation to ensure it runs smoothly. If issues persist, refer to the troubleshooting section in the manual for specific error codes and solutions. Always follow safety guidelines when performing resets.

Environmental Impact and Efficiency

The SuperFlo VST is designed with energy efficiency in mind, earning the Eco Select brand distinction for its environmentally friendly performance, reducing energy consumption and carbon footprint effectively.

Energy Efficiency Features

The SuperFlo VST is engineered with advanced energy-saving technology, featuring variable speed operation that adapts to demand, significantly reducing energy consumption. Its Totally Enclosed Fan-Cooled (TEFC) motor ensures optimal performance while minimizing heat loss. Designed for sustainability, the pump offers multiple preset speeds, allowing users to customize operation for specific tasks, further enhancing efficiency. This eco-friendly design not only lowers energy bills but also reduces environmental impact, making it a superior choice for environmentally conscious pool owners seeking reliable and cost-effective solutions.

Eco Select Brand Distinction

The SuperFlo VST has earned the Eco Select brand distinction, recognizing it as one of Pentair’s most environmentally friendly products. This designation underscores its ability to significantly reduce energy consumption and carbon emissions compared to traditional pumps. By utilizing advanced variable speed technology, the pump delivers high performance while promoting sustainability, aligning with eco-conscious values. This distinction not only highlights its efficiency but also its contribution to a greener future, making it a top choice for pool owners prioritizing both performance and environmental responsibility.

Reducing Carbon Footprint with SuperFlo VST

The SuperFlo VST significantly reduces carbon emissions through its energy-efficient design and variable speed technology. By optimizing pump performance to match demand, it consumes less energy, lowering overall carbon output. The pump’s adaptive speed settings allow for quieter operation and reduced energy usage during off-peak times. This eco-friendly approach not only minimizes environmental impact but also cuts energy costs, making it a sustainable choice for pool owners. With the SuperFlo VST, users can enjoy a greener, more efficient pool system that supports environmental conservation while maintaining superior performance.

For comprehensive guidance, visit the official Pentair website to download the SuperFlo VST manual or scan the provided QR code for additional support and resources.

The SuperFlo VST is a high-efficiency variable speed pump designed for pool systems, offering energy savings and reliability. Its Eco Select brand distinction underscores its environmental benefits. The manual provides detailed guidance on installation, operation, and maintenance, ensuring optimal performance. Key features include advanced programming options, troubleshooting solutions, and safety instructions. Regular maintenance tasks and inspection procedures are emphasized to prolong pump life. Users can access additional resources, such as performance curves and setup guides, through the official Pentair website or the provided QR code for a seamless experience.

Accessing the Official SuperFlo VST Manual

The official SuperFlo VST manual is available for free download on the Pentair website. Users can visit the site and download a digital copy or scan the provided QR code for quick access. The manual includes detailed installation, operation, and maintenance instructions, ensuring optimal use of the pump. Additional resources, such as performance curves and setup guides, are also accessible online. For convenience, the manual is available in multiple formats, including PDF, and can be saved for future reference. This ensures pool owners have all necessary information to maximize the pump’s efficiency and longevity.

Recommended Tools and Accessories

For optimal installation and maintenance of the SuperFlo VST, use tools like screwdrivers, pliers, and a multimeter. Genuine Pentair accessories, such as replacement seals and gaskets, ensure compatibility. The manual recommends Pentair-approved products for reliability. Additional accessories like a digital keypad or remote control enhance functionality. Regularly check for updated tools and parts on the Pentair website to maintain performance. Using authorized accessories guarantees safety and efficiency, ensuring the pump operates at its best. Always refer to the manual for specific tool recommendations and compatibility guidelines.

kindle paperwhite 11th generation user guide pdf

Welcome to the Kindle Paperwhite 11th Generation user guide! This comprehensive manual helps you master your e-reader, exploring its features, settings, and tips for an enhanced reading experience․

Overview of the Kindle Paperwhite 11th Generation

The Kindle Paperwhite 11th Generation is a versatile e-reader designed to enhance your reading experience․ With an 8GB storage capacity, it supports various file formats like AZW3, PDF, MOBI, and more․ The device features a high-quality display and long battery life, making it ideal for both casual readers and students․ Parental controls are included to manage access to certain features․ This generation also supports audiobooks, adding flexibility to your reading habits․ The user guide is available in PDF format, providing detailed instructions for setup, navigation, and customization․ Whether you’re reading eBooks or studying, the Kindle Paperwhite 11th Generation offers a seamless and enjoyable experience․

Importance of the User Guide

The user guide for the Kindle Paperwhite 11th Generation is an essential resource for maximizing the device’s potential․ It provides step-by-step instructions for setup, navigation, and customization, ensuring a smooth transition for new users․ The guide also includes troubleshooting tips for common issues, such as connectivity problems or frozen screens․ Additionally, it covers advanced features like parental controls and file management, helping users tailor their experience․ Available in PDF format, the guide is easily accessible online, making it a valuable companion for both beginners and experienced users․ By following the guide, users can unlock all the device’s capabilities and enjoy a seamless reading experience․

Structure of the Article

Getting Started

Unbox your Kindle Paperwhite, charge it, and follow the setup guide to register and customize your device for a seamless reading experience from the start․

Unpacking and First Impressions

When you unbox your Kindle Paperwhite 11th Generation, you’ll find the device, a quick start guide, and a USB-C charging cable․ The sleek, lightweight design feels premium, with a smooth finish that fits comfortably in your hand․ The 6․8-inch display is crisp and glare-free, offering a paper-like reading experience․ First impressions highlight the device’s portability and ergonomic design, making it ideal for long reading sessions․ The intuitive interface and responsive controls provide a seamless user experience right out of the box․ The initial setup process is straightforward, guiding you through registration and customization to get you started on your reading journey․

Charging the Device

Your Kindle Paperwhite 11th Generation comes with a USB-C charging cable․ To charge, connect the cable to a compatible USB-C charger or USB port on your computer․ The device supports fast charging, reaching a full battery in about 4-6 hours․ A single charge lasts up to 10 weeks with average use․ The battery indicator, located in the top-right corner, shows charging status․ Avoid using unauthorized chargers to prevent damage․ Always allow the device to charge fully before first use for optimal performance․ Keep your Kindle charged and ready for uninterrupted reading sessions․ Regularly updating your device ensures the latest battery optimization features are active․

Setting Up Your Kindle Paperwhite

Setting up your Kindle Paperwhite is straightforward․ Start by turning on the device using the power button․ Follow the on-screen instructions to select your language and connect to Wi-Fi․ Register your Kindle to access your Amazon library․ The setup process includes navigating through various options to customize your reading experience․ Use the touch-sensitive display to easily move through menus․ Ensure your device is fully charged before starting․ Refer to the included quick start guide for detailed steps․ This initial setup ensures your Kindle is ready for reading and exploring all its features․ Check for the latest software version during setup for optimal performance․

Registering Your Kindle

Registering your Kindle Paperwhite is essential to access your books and features․ Connect to Wi-Fi and sign in with your Amazon account during setup․ If you don’t have an account, create one․ Registration links your device to your Amazon account, allowing you to purchase, download, and sync content․ Ensure your device is connected to the internet for a smooth registration process․ Once registered, you can access your library, manage settings, and enjoy personalized recommendations․ Refer to the user guide for detailed steps if needed․ Proper registration ensures seamless integration with Amazon services and enhances your reading experience․ Complete this step to unlock all features․

Key Features of the Kindle Paperwhite 11th Generation

The Kindle Paperwhite 11th Generation boasts a high-resolution display, ample storage, long battery life, and features like parental controls and adjustable lighting for a superior reading experience․

Display and Screen Quality

The Kindle Paperwhite 11th Generation features a 6․8-inch glare-free display with 300 pixels per inch (PPI), ensuring crisp, sharp text and images․ The Carta Display technology enhances readability, making it feel like real paper․ The screen is designed to reduce eye strain, even during extended reading sessions․ With adjustable brightness, you can customize the screen to suit your environment, from bright daylight to dim lighting․ The device also includes a blue shade feature, which reduces screen brightness for comfortable reading in the dark․ These features combine to provide a premium reading experience, making it ideal for both indoor and outdoor use․ The display quality is a standout feature, offering clarity and comfort for all types of content․

Storage Capacity and File Formats

The Kindle Paperwhite 11th Generation offers two storage options: 8GB and 16GB, providing ample space for thousands of books․ It supports a wide range of file formats, including AZW3, AZW, MOBI, PDF, TXT, and more, making it versatile for various reading materials․ The device can store textbooks, novels, and documents, catering to both casual readers and students․ However, it does not support expandable storage via an SD card․ The 16GB model is ideal for users with large libraries or those who prefer carrying multiple books․ This versatility ensures compatibility with most digital content, enhancing the overall reading experience․ The storage capacity is designed to meet the needs of diverse users, offering flexibility and convenience․

Battery Life and Performance

The Kindle Paperwhite 11th Generation delivers exceptional battery life, lasting weeks on a single charge, even with Wi-Fi enabled and moderate brightness․ Its energy-efficient design ensures uninterrupted reading sessions․ The device supports USB-C charging, offering faster charging times compared to previous models․ Performance is smooth, with quick page turns and seamless navigation․ Whether you’re reading eBooks, PDFs, or adjusting settings, the Kindle operates efficiently․ The battery life remains consistent across both the 8GB and 16GB models, making it ideal for travelers and heavy users․ This reliability enhances the overall reading experience, allowing users to focus on their content without frequent recharging․

Additional Features (Parental Controls, Lighting, etc․)

The Kindle Paperwhite 11th Generation includes a range of additional features that enhance usability․ Parental Controls allow users to restrict access to certain functions, such as the experimental web browser and Kindle Store, ensuring a child-friendly experience․ The device also features an adaptive front light, providing optimal illumination for reading in various lighting conditions․ This ensures comfortable reading without eye strain, whether in bright daylight or a dimly lit room․ These thoughtful additions make the Kindle Paperwhite 11th Generation a versatile and user-friendly e-reader, catering to both individual preferences and family needs with ease and efficiency․

Reading Experience

The Kindle Paperwhite 11th Generation offers a superior reading experience with its glare-free display, adjustable fonts, and built-in light․ Customize settings and enjoy seamless page turns for comfort and immersion․

Navigating the Interface

The Kindle Paperwhite 11th Generation features an intuitive interface designed for seamless navigation․ At the top, you’ll find a toolbar with options like Back, Home, and the menu icon for additional settings․ Below lies the main content area, where your books or documents are displayed․ Use gestures like swiping left or right to turn pages, or tap the edges of the screen for a more precise page-turning experience․ The interface is minimalistic, ensuring that your focus remains on the text․ You can also access the dictionary, bookmarks, and annotations by long-tapping on text․ Customizable font sizes and brightness settings further enhance readability, making navigation straightforward and enjoyable․

Adjusting Settings for Comfortable Reading

The Kindle Paperwhite 11th Generation offers a variety of settings to tailor your reading experience․ Adjust the font size by pinching your fingers or using the display settings menu․ Choose from multiple font styles to suit your preference․ The built-in light allows you to adjust brightness levels manually or enable auto-brightness for optimal readability in any environment․ You can also customize margins and line spacing to reduce eye strain․ Additionally, the device supports orientation changes between portrait and landscape modes․ These features ensure that your reading experience is comfortable and personalized, making it easier to immerse yourself in your favorite books or documents for hours on end․

Using the Built-in Dictionary and Vocabulary Builder

The Kindle Paperwhite 11th Generation includes a built-in dictionary and Vocabulary Builder to enhance your reading experience․ To access the dictionary, simply tap on a word while reading, and a definition will appear instantly․ This feature is particularly useful for expanding your vocabulary and understanding complex texts․ The Vocabulary Builder also allows you to review words you’ve looked up by storing them in a dedicated section․ You can revisit these words later to reinforce your learning․ These tools make reading more interactive and educational, helping you grow your vocabulary effortlessly while enjoying your favorite books or documents on the go․

File Management

The Kindle Paperwhite 11th Generation supports multiple file formats, including AZW3, PDF, MOBI, and more, making it easy to transfer and organize your library efficiently․

Supported File Formats (AZW3, PDF, MOBI, etc․)

The Kindle Paperwhite 11th Generation supports a wide range of file formats, ensuring compatibility with various types of e-books and documents․ Native support includes AZW3, AZW, MOBI, PDF, TXT, and PRC․ Users can seamlessly access and read files in these formats without needing additional software․ PDF files are particularly useful for academic and professional materials, while AZW3 offers enhanced formatting and readability․ This versatility makes the device an excellent choice for both casual readers and individuals requiring access to complex documents, such as students and professionals․ The ability to handle multiple formats ensures a smooth and flexible reading experience;

Transferring Books to Your Kindle

Transferring books to your Kindle Paperwhite 11th Generation is straightforward and convenient․ Books can be transferred via Wi-Fi, USB, or email using the Send-to-Kindle feature․ For Wi-Fi, simply purchase and download books from the Kindle Store, and they will automatically sync to your device․ Using a USB cable, you can transfer DRM-free books from your computer to the Kindle by dragging and dropping files into the “Documents” folder․ Additionally, you can email supported file formats like AZW3, MOBI, and PDF to your Kindle-approved email address․ Ensure DRM-protected books are in a Kindle-compatible format before transferring․ This ensures seamless access to your library․

Organizing Your Library

Organizing your library on the Kindle Paperwhite 11th Generation is intuitive and efficient․ You can categorize books into custom collections based on genre, author, or reading status․ To create a collection, go to the home screen, select “Create New Collection,” and add books manually or in bulk․ Additionally, you can mark books as favorites for quick access or archive less frequently read titles to declutter your list․ The device also allows sorting books by title, author, or most recently read․ Use the built-in search function to quickly locate specific books․ This feature ensures your library remains tidy and your reading experience seamless and enjoyable․

Customization Options

Customize your Kindle Paperwhite 11th Generation to suit your reading preferences․ Adjust font sizes, choose from various fonts, and fine-tune brightness for optimal readability in any lighting․

Changing Fonts and Font Sizes

Customizing the reading experience on your Kindle Paperwhite 11th Generation is straightforward․ You can change fonts to suit your preferences, choosing from a variety of options to enhance readability․ Additionally, adjust font sizes effortlessly using the slider in the display settings menu․ This feature ensures that your reading experience is comfortable, whether you’re reading in bright light or a cozy environment; The ability to personalize fonts and sizes makes the Kindle Paperwhite 11th Generation adaptable to different reading styles and preferences, ensuring optimal comfort for all users․

Adjusting Brightness and Lighting

The Kindle Paperwhite 11th Generation offers a built-in light, allowing you to adjust brightness levels for optimal reading comfort in any setting․ To modify the brightness, access the quick settings menu by swiping down from the top of the screen․ Use the slider to increase or decrease the light intensity․ This feature ensures clear visibility in both bright environments and low-light conditions, providing a glare-free reading experience․ The adaptive lighting is designed to minimize eye strain, making it ideal for extended reading sessions․ Adjusting the brightness is simple and intuitive, enhancing your overall reading satisfaction․

Customizing Your Reading Settings

The Kindle Paperwhite 11th Generation allows you to tailor your reading experience with customizable settings․ Adjust font size, style, and line spacing to suit your preferences․ Additionally, you can modify margins and orientation for a more comfortable read․ Access these options by tapping the top menu or long-pressing on the screen․ The device also supports customizing bookmarks, highlights, and notes, making it easier to organize your reading materials․ These features ensure that your reading experience is personalized and enjoyable, catering to your unique needs and preferences․

Parental Controls

Parental Controls on the Kindle Paperwhite 11th Generation allow you to restrict access to features like the experimental web browser, Kindle Store, and Cloud storage, ensuring a safe experience for minors․

Setting Up and Using Parental Controls

To enable Parental Controls on your Kindle Paperwhite 11th Generation, navigate to the device settings․ Select “Parental Controls” and create a password to restrict access․ This feature allows you to limit access to the experimental web browser, Kindle Store purchases, and Cloud storage․ Once activated, a parental control indicator will appear on the screen․ This ensures a safe and controlled environment for minors․ Follow the on-device instructions or refer to the official user guide for detailed steps to customize these settings and manage usage effectively․

Connectivity and Sharing

Explore how to connect your Kindle Paperwhite to Wi-Fi for seamless book downloads and syncing․ Discover features for sharing highlights, notes, and books effortlessly with others․

Connecting to Wi-Fi

To connect your Kindle Paperwhite to Wi-Fi, navigate to the device’s settings menu․ Select “Wi-Fi” and choose your network from the available options․ Enter the password if required․ Once connected, a confirmation message will appear․ Ensure your router is nearby for a stable connection․ If issues arise, restart your router or reset your Kindle’s network settings․ This connection allows you to download books, sync your library, and access additional features seamlessly․ Proper Wi-Fi setup is essential for optimal performance and syncing your reading material across devices․

Sharing Books and Highlights

Sharing books and highlights on your Kindle Paperwhite is a convenient feature for connecting with others․ To share a book, navigate to the “Manage Your Content and Devices” section on Amazon․ Select the title and choose “Loan” or “Share” to send it via email․ For highlights, go to the “My Notes & Highlights” section on your device․ Sync your Kindle to ensure highlights are saved to your Amazon account․ You can then export or share them via email or social media․ This feature is ideal for book clubs, study groups, or personal reflection․ Sharing enhances the reading experience and fosters community engagement․

Troubleshooting Common Issues

Resolve connectivity problems by restarting your Kindle or checking Wi-Fi settings․ For frozen screens, restart the device or charge it if the battery is low․

Resolving Connectivity Problems

Connectivity issues on your Kindle Paperwhite 11th Generation can often be resolved with simple troubleshooting steps․ First, restart your device by holding the power button for 30 seconds․ Ensure Wi-Fi is enabled and your network is selected․ If issues persist, forget the network and reconnect using your password․ Check your router’s stability and move closer to it for a stronger signal․ Disable Airplane Mode if activated․ Resetting network settings or performing a factory reset via Settings > Menu > Reset Device may also resolve the problem․ If none of these steps work, contact Amazon support for further assistance․

Fixing Frozen or Unresponsive Screens

If your Kindle Paperwhite 11th Generation screen freezes or becomes unresponsive, start by restarting it․ Press and hold the power button for 30 seconds to force a restart․ If the issue persists, perform a factory reset via Settings > Menu > Reset Device․ Ensure your device is fully charged, as a drained battery might prevent it from responding․ Check for software updates in the settings to ensure you’re running the latest version․ Remove any screen protectors or cases that could interfere with the touchscreen․ If problems continue, contact Amazon support for further assistance or potential repair options․

User Guides and Resources

Access the official Kindle Paperwhite 11th Generation user guide online for detailed instructions․ Explore additional tips, tricks, and resources for further assistance․

Accessing the Official Kindle Paperwhite User Guide

To access the official Kindle Paperwhite 11th Generation user guide, visit Amazon’s Device Support page․ Here, you’ll find a downloadable PDF version tailored to your device, providing step-by-step instructions and troubleshooting tips․ Additionally, the guide includes details on new features, compatibility, and optimal usage practices․ For convenience, the manual is available in multiple languages, ensuring accessibility for users worldwide․ If you encounter issues, Amazon’s support resources offer further assistance, helping you maximize your e-reader’s potential and enhance your reading experience․

Additional Tips and Tricks

Maximize your Kindle Paperwhite 11th Generation experience with these expert tips․ Customize your reading settings by adjusting fonts and margins for comfort․ Utilize parental controls to restrict access to certain features․ Organize your library with collections and tags for easy access․ Enable Goodreads integration to share your reads and discover new books․ Use the built-in dictionary for instant word definitions․ Experiment with night mode for reading in low-light conditions․ Take screenshots by touching opposite corners of the screen․ Regularly sync your device to ensure all books are up-to-date․ Explore the experimental browser for web access․ Refer to the user guide for more hidden features and tips to enhance your reading journey․

Wrapping up, the Kindle Paperwhite 11th Generation excels as a reading companion, combining great features and ease of use․ This guide ensures you get the most out of your device, enhancing your reading experience․

Final Thoughts on the Kindle Paperwhite 11th Generation

The Kindle Paperwhite 11th Generation stands out as an exceptional e-reader, offering a glare-free display, built-in light, and impressive storage capacity․ Its long battery life and sleek design make it ideal for book lovers․ With support for multiple formats like AZW3, PDF, and MOBI, it caters to diverse reading preferences․ The intuitive interface and customizable settings ensure a personalized reading experience․ Parental controls add an extra layer of convenience for family use․ This guide has covered everything from setup to advanced features, helping you maximize your device’s potential․ Whether you’re a casual reader or an avid bookworm, the Kindle Paperwhite 11th Generation delivers unparalleled satisfaction․

fairtex shin guard size guide

Fairtex shin guards are renowned for their premium quality, durability, and ergonomic design, offering superior protection for Muay Thai and martial arts training. Crafted with Syntek leather and water-resistant lining, they provide exceptional comfort and longevity. Available in various sizes, Fairtex ensures a tailored fit for athletes of all levels, making them a top choice for enthusiasts worldwide.

Overview of Fairtex as a Brand

Fairtex is a highly regarded brand in the martial arts industry, specializing in premium-quality equipment for Muay Thai and combat sports. Known for their innovative designs and durable materials, Fairtex has built a reputation for delivering gear that meets the demands of professional athletes and enthusiasts alike. Their product line includes shin guards, boxing gloves, and training apparel, all crafted with attention to detail and a commitment to excellence. By combining traditional craftsmanship with modern technology, Fairtex continues to be a trusted choice for those seeking high-performance martial arts equipment.

Importance of Proper Shin Guard Fit

Properly fitting shin guards are essential for both protection and performance during training or competition. A good fit ensures adequate coverage of the shin and knee, reducing the risk of injury. Ill-fitting guards can cause discomfort, restrict movement, or leave vulnerable areas exposed, potentially leading to injuries. Fairtex shin guards are designed with precision to provide optimal protection while maintaining mobility. A proper fit also enhances training effectiveness, allowing athletes to focus on their technique without distractions. Ensuring the right size is crucial for peak performance and safety in martial arts disciplines.

Understanding Shin Guard Sizing

Shin guard sizing involves measuring shin length, calf circumference, and foot protection needs. Proper sizing ensures optimal protection, comfort, and mobility during training or competition.

How to Measure Your Shin for the Perfect Fit

To ensure a proper fit, measure from the bottom of your knee to the top of your ankle using a flexible measuring tape. This distance determines the shin guard length. For Fairtex models like the SP5 and SP8, accuracy is key to avoid discomfort or limited mobility. Measure both legs, as sizes may differ slightly. Note the circumference of your calf to ensure the straps fit securely. Proper measurement ensures the shin guard covers from just below the knee to above the ankle, providing optimal protection without hindering movement. This step is crucial for selecting the right size.

Factors Influencing Shin Guard Size: Height, Weight, and Leg Circumference

When selecting the right shin guard size, height, weight, and leg circumference are essential considerations. Taller individuals typically require longer shin guards, while weight can affect calf size and strap fit. Leg circumference, particularly around the widest part of the calf, ensures the straps secure the guard without slipping. Fairtex offers a range of sizes to accommodate these factors, from Small to Extra-Large, ensuring a snug and protective fit for diverse body types. Proper fit prevents discomfort and enhances performance during training or competition. Accurate measurement of these factors guarantees optimal protection and mobility.

Fairtex Shin Guard Size Chart Breakdown

The Fairtex shin guard size chart provides detailed measurements for Small, Medium, Large, and Extra-Large options, accommodating various heights, weights, and leg circumferences. This guide ensures accurate sizing.

Size Options: Small, Medium, Large, and Extra-Large

The Fairtex shin guards are available in four sizes: Small, Medium, Large, and Extra-Large. Each size is designed to accommodate different leg lengths and circumferences. The Small size is ideal for shorter shin bones, typically measuring 13-14 inches, while the Medium suits those with shins measuring 14-15 inches. The Large size fits shin lengths of 15-16 inches, and the Extra-Large is designed for longer shins, measuring 16-17 inches. This range ensures a snug, protective fit for athletes of various statures and training needs, providing both comfort and durability during intense sessions.

Comparing Measurements Across Different Fairtex Models (SP3, SP5, SP8)

Fairtex offers three distinct models—SP3, SP5, and SP8—each with unique measurements and features. The SP3 is the most compact, suitable for shorter shins, while the SP5 provides a balanced fit with slightly longer coverage. The SP8 is the largest, designed for wider calves and longer shins, offering extended protection around the knee area. Each model’s sizing chart varies slightly, emphasizing the importance of matching your measurements to the specific model to ensure optimal fit and performance during training or competition.

Key Features of Fairtex Shin Guards

Fairtex shin guards are known for their lightweight yet durable design, featuring Syntek leather and water-resistant lining. They provide excellent protection and comfort, ensuring optimal mobility during training.

Material and Construction: Syntek Leather and Water-Resistant Lining

Fairtex shin guards are constructed with Syntek leather, a high-quality synthetic material that mimics the durability of genuine leather while maintaining a lightweight feel. The water-resistant lining ensures moisture wicking, keeping the shin guards dry and comfortable during intense training sessions. This combination not only enhances performance but also prolongs the product’s lifespan. The seamless integration of these materials provides a snug, irritation-free fit, making Fairtex shin guards a preferred choice for athletes seeking both protection and comfort. Their design focuses on functionality and longevity.

Padding Design: Double Padded for Maximum Protection

Fairtex shin guards feature a double-padded design that provides exceptional protection during high-impact strikes. The padding is thickest at the center, targeting the most vulnerable areas of the shin, while tapering toward the edges for a sleek, non-bulky fit. This design ensures maximum cushioning without compromising mobility. The ergonomic padding distributes impact evenly, reducing stress on the legs during kicks and strikes. Whether for sparring or heavy bag work, the double-padded construction offers unparalleled comfort and durability, making Fairtex shin guards a top choice for athletes seeking reliable protection.

Fairtex Shin Guard Fit and Comfort

Fairtex shin guards are designed for a snug, ergonomic fit, ensuring optimal comfort during training. Their breathable, water-resistant lining and double-padded design enhance mobility and protection.

How Shin Guards Should Fit: Coverage and Snugness

Fairtex shin guards should fit snugly, covering from just below the knee to the top of the foot for optimal protection. They should not be too tight, allowing for a full range of motion while training. The double-padded design ensures maximum cushioning, especially at high-impact zones, without compromising comfort. Breathable, water-resistant lining keeps the skin dry, preventing chafing and irritation. Proper fit ensures the shin guard stays in place during intense movements, offering both support and flexibility. Snugness is key to prevent shifting, while coverage ensures comprehensive protection for the shin and ankle areas.

Ergonomic Design for Optimal Mobility

Fairtex shin guards feature an ergonomic design that contours to the natural shape of the leg, ensuring maximum mobility during training. The curved padding and tapered edges provide a sleek fit, allowing for unrestricted movement. Two velcro straps are strategically placed behind the calf for a secure fit without digging into the skin. The bridge system connecting the shin and foot protector enhances flexibility, while the elastic under the forefoot keeps the guard in place. This design balances protection with comfort, enabling athletes to perform at their best without hindrance.

Specialized Sizing Needs

Fairtex shin guards cater to unique sizing requirements, such as wider calves and enhanced knee protection, ensuring optimal fit and comfort for diverse body types and training needs.

Shin Guards for Wider Calves

Fairtex shin guards offer tailored solutions for individuals with wider calves, ensuring a secure and comfortable fit. Models like the SP8 are designed with an ergonomic shape and adjustable straps to accommodate larger leg sizes. The calf portion is wider compared to standard sizes, providing ample coverage without compromising mobility. For those with wider calves, Fairtex recommends sizing up or consulting the size chart for precise measurements. This ensures optimal protection and comfort during training, making Fairtex a top choice for athletes with specific sizing needs. Always try them on if possible for the best fit.

Shin Guards for Knee Protection

Fairtex shin guards, particularly the SP8 model, prioritize knee protection with extended padding along the outer edges. This design safeguards the knee area, especially during kicks, while maintaining mobility. The SP8’s wider coverage and ergonomic shape make it ideal for athletes with knee injuries or vulnerabilities. The padding is thickest where impact is most likely, ensuring superior protection without hindering movement. For those needing enhanced knee support, Fairtex’s SP8 model is a top choice, offering both durability and comfort. Always consult the size chart to ensure the best fit for optimal protection.

Personal Preferences and Activity Type

Your training style and activity level influence shin guard choice. Fairtex offers models like SP5 for all-round use and SP8 for enhanced knee protection, catering to specific needs.

Choosing the Right Shin Guard for Your Training Style

Selecting the right Fairtex shin guard involves considering your training style. For heavy sparring, models like the SP8 offer extra padding and lateral knee protection. If you prioritize mobility, the SP5 is ideal with its snug, curved design. Fighters focusing on striking may prefer the SP3 for its lightweight feel. Always match your shin guards to your training intensity and preferences to ensure optimal performance and comfort. Proper fit and coverage are key to avoiding injuries and enhancing your overall training experience.

Impact of Shin Guard Fit on Performance

A well-fitted shin guard significantly enhances performance by providing optimal protection and mobility. Proper fit prevents shifting during training, reducing distractions and potential injuries. Ill-fitting guards can impede movement, affecting technique and overall performance. Fairtex shin guards are designed to deliver comfort and support, allowing athletes to focus on their training without discomfort. Ensuring a snug yet non-restrictive fit is crucial for maximizing performance and longevity of the shin guards. Proper sizing directly contributes to better execution of kicks, strikes, and defensive maneuvers during martial arts training.

Consulting the Fairtex Size Chart

Use a measuring tape to accurately measure your shin and calf circumference. Refer to the Fairtex size chart, matching your measurements to ensure a proper fit.

Step-by-Step Guide to Using the Size Chart

To accurately determine your size, start by measuring your shin length from the knee to the ankle using a flexible tape measure. Next, measure the circumference of your calf at its widest point. Compare these measurements to the Fairtex size chart, ensuring both dimensions align with the provided guidelines. Consider your height and weight as additional reference points, but prioritize the direct measurements for the most accurate fit. Finally, select the size that best matches your measurements to ensure optimal protection and comfort during training.

Matching Your Measurements to the Correct Size

Once you have your shin length and calf circumference measurements, align them with the Fairtex size chart. Shin guards should cover from just below the knee to the top of the ankle, ensuring full protection. For wider calves, consider larger sizes like XL, which offer more circumference space. If your shin length falls between sizes, opt for the larger size to avoid restrictive fit. Ensure the Velcro straps can secure snugly without overlapping excessively, guaranteeing both comfort and protection during training sessions.

Trying Before Buying

Trying on shin guards ensures a perfect fit, reducing return hassles. Check coverage, snugness, and mobility to confirm comfort and protection during training or competition.

Importance of Trying On Shin Guards

Trying on shin guards is crucial for ensuring proper fit and comfort. It allows you to assess how well they stay in place during movement and provide adequate protection. Additionally, it helps verify that the size matches your body type, avoiding issues like tightness or looseness. This step is especially important if you have wider calves or specific protection needs, as it ensures the guards meet your unique requirements for both performance and safety.

What to Look for When Trying On Shin Guards

When trying on shin guards, ensure they provide full coverage from just below the knee to the top of the foot for optimal protection. Check for a snug, secure fit without feeling too tight or restrictive. Verify that the padding is even and doesn’t cause discomfort or irritation. Mobility is key—ensure they allow proper movement during kicks, steps, and strikes. Pay attention to the strap placement and adjustability to confirm they stay in place during activity. For Fairtex models, ensure the curved design fits naturally around your shins and calves for a comfortable, performance-ready fit.

Choosing the right Fairtex shin guard size ensures optimal protection and performance. Always consult the size chart and try them on for a secure, comfortable fit tailored to your needs.

Final Tips for Choosing the Right Fairtex Shin Guard Size

For an ideal fit, measure your shin circumference and length carefully. Consider your training style and personal preferences for snugness versus mobility. If possible, try on the shin guards before purchasing to ensure comfort and coverage. Refer to Fairtex’s size chart, which accounts for height, weight, and leg measurements, ensuring the guards cover from below the knee to above the ankle. Prioritize proper fit to maximize protection and performance during training or competition.

Additional Resources for Further Guidance

For comprehensive insights, visit Nak Muay Wholesale, offering detailed reviews and size charts for Fairtex shin guards. Their articles provide comparative analysis with other brands, helping you make informed decisions. Additionally, Fairtex’s official website features sizing guides and product specifications. Engage with Muay Thai communities and forums for firsthand experiences and tips from seasoned practitioners. Utilize these resources to ensure your choice aligns with your training needs and preferences, enhancing both performance and safety.

ap biology protein structure pogil answer key pdf

AP Biology explores the intricate world of proteins, focusing on their structures and functions. POGIL activities enhance understanding of primary, secondary, tertiary, and quaternary structures through guided inquiry.

1.1 Overview of AP Biology

AP Biology is a rigorous, college-level course that explores the fundamental principles of life. It focuses on four big ideas: molecules, heredity, evolution, and biological systems. Students analyze complex biological concepts, including protein structure and function, through hands-on labs, case studies, and collaborative activities. POGIL (Process-Oriented Guided-Inquiry Learning) plays a key role, fostering critical thinking and teamwork. These activities guide students to explore protein structures, from primary to quaternary levels, and their functional significance. The course prepares students for advanced studies and real-world applications in biology and related fields.

1.2 Importance of Protein Structure in AP Biology

Protein structure is central to AP Biology, as it directly relates to function. Understanding the four levels—primary, secondary, tertiary, and quaternary—reveals how proteins perform essential roles in cells. Functional groups and peptide bonds are crucial for enzyme activity, transport, and signaling. POGIL activities emphasize this connection, guiding students to analyze how structural changes impact function. Mastery of protein structure is vital for comprehending broader biological processes, such as metabolism, DNA replication, and immune responses, making it a cornerstone of the AP Biology curriculum.

POGIL (Process-Oriented Guided-Inquiry Learning) activities are collaborative, student-centered lessons that promote active learning. They are designed to guide students through complex scientific concepts using a structured, inquiry-based approach. In AP Biology, POGIL activities often focus on protein structure, helping students explore primary, secondary, tertiary, and quaternary levels. These activities encourage critical thinking, teamwork, and problem-solving, preparing students for independent learning and mastery of key biological principles.

Understanding Protein Structure

Protein structure is crucial for function, comprising primary, secondary, tertiary, and quaternary levels. POGIL activities help students explore these levels interactively, enhancing their understanding of biological processes.

2.1 Primary Structure of Proteins

The primary structure of proteins refers to the sequence of amino acids linked by peptide bonds. This sequence determines the overall 3D structure and function of the protein. POGIL activities emphasize understanding how amino acids connect and the significance of peptide bonds. Students explore how variations in sequences lead to different protein functions, reinforcing the concept that structure dictates function. These activities also address common misconceptions and provide clear explanations to ensure mastery of this fundamental concept in AP Biology.

2.2 Secondary Structure of Proteins

The secondary structure of proteins involves local arrangements of amino acids, primarily through hydrogen bonding. The two main types are the alpha-helix and beta-sheet. Alpha-helices form a spiral structure, while beta-sheets consist of parallel or anti-parallel strands. These structures are stabilized by hydrogen bonds between the backbone atoms of amino acids. POGIL activities help students visualize and identify these structures, emphasizing their role in protein stability and function. Understanding secondary structures is crucial for analyzing how proteins fold and interact at higher structural levels.

2.3 Tertiary Structure of Proteins

The tertiary structure represents the three-dimensional folding of the entire polypeptide chain. It involves interactions such as hydrogen bonds, ionic bonds, disulfide bridges, and hydrophobic interactions. This level of structure is crucial for the protein’s biological function. POGIL activities guide students to analyze how these interactions stabilize the tertiary structure and enable enzyme activity, ligand binding, and other functions. Understanding tertiary structure helps in predicting how proteins interact within cellular environments and their roles in diseases when misfolded.

2.4 Quaternary Structure of Proteins

The quaternary structure refers to the arrangement of multiple polypeptide chains in a single protein. These subunits are held together by non-covalent interactions like hydrogen bonds, ionic bonds, and hydrophobic interactions. This structure is essential for the protein’s function, as seen in hemoglobin and antibodies. POGIL activities guide students to explore how environmental factors, such as pH and temperature, can disrupt these interactions, leading to denaturation. Understanding quaternary structure highlights the importance of protein subunits in biological processes.

POGIL Activities in AP Biology

POGIL activities engage students in collaborative, critical thinking about protein structure, fostering a deep understanding of biological concepts through structured, inquiry-based learning experiences.

3.1 What are POGIL Activities?

POGIL (Process-Oriented Guided-Inquiry Learning) activities are collaborative, student-centered learning exercises that emphasize critical thinking and scientific literacy. In AP Biology, these activities guide students through structured inquiry to explore complex topics like protein structure. Each activity is designed to promote active learning, where students work in groups to analyze data, answer questions, and apply concepts. POGIL activities often include models, diagrams, and guided questions to help students construct their understanding of biological processes, such as the four levels of protein structure and their functional significance.

3.2 Role of POGIL in Teaching Protein Structure

POGIL activities play a pivotal role in teaching protein structure by engaging students in interactive, inquiry-based learning. Through structured exercises, students explore the primary, secondary, tertiary, and quaternary levels of protein structure. These activities emphasize the relationship between structure and function, allowing students to visualize and understand how amino acid sequences fold into functional proteins. By working in groups, students develop critical thinking and collaboration skills, ensuring a deeper grasp of complex biological concepts essential for success in AP Biology.

3.3 Key Concepts Taught Through POGIL Activities

POGIL activities emphasize understanding the four levels of protein structure: primary (amino acid sequence), secondary (alpha-helices, beta-sheets), tertiary (3D folding), and quaternary (multiple chains). They also focus on the role of functional groups, peptide bonds, and non-covalent interactions in stabilizing these structures. Students learn how environmental factors like pH and temperature affect protein stability and function. These activities highlight the connection between structure and function, enabling students to analyze how changes at any level can impact protein activity, preparing them for advanced AP Biology concepts.

Key Concepts in Protein Structure

Protein structure includes primary (amino acid sequence), secondary (alpha-helices, beta-sheets), tertiary (3D folding), and quaternary (multiple chains) levels, stabilized by bonds and functional groups.

4.1 Functional Groups and Their Role

Functional groups in amino acids play a crucial role in protein structure and function. These groups, such as hydroxyl (-OH), amino (-NH₂), and carboxyl (-COOH), participate in bonding. Hydrogen bonds and disulfide bridges stabilize secondary and tertiary structures. Ionic bonds and hydrophobic interactions further contribute to protein stability. POGIL activities emphasize how these groups influence folding and active site formation. Understanding their chemistry is key to grasping protein function and its response to environmental changes like pH and temperature.

4.2 Peptide Bonds and Their Significance

Peptide bonds are the chemical links between amino acids in a polypeptide chain, formed through dehydration synthesis. They connect the carboxyl group of one amino acid to the amino group of another, creating a strong and stable bond. This bond is essential for the primary structure of proteins, determining the sequence of amino acids that fold into functional 3D shapes. POGIL activities often focus on how peptide bonds form and their role in protein synthesis, emphasizing their importance in maintaining structural integrity and enabling biological functions.

4.3 Hydrogen Bonds and Disulfide Bonds

Hydrogen bonds are weak electrostatic attractions that stabilize secondary, tertiary, and quaternary protein structures. They form between the positively charged hydrogen atoms of one amino acid and the negatively charged oxygen or nitrogen atoms of another. Disulfide bonds, however, are strong covalent links between sulfur atoms of cysteine residues, enhancing structural stability. These bonds are crucial for maintaining the folds of proteins, particularly in extracellular environments. POGIL activities often highlight how these interactions influence protein folding and function, emphasizing their significance in biological processes.

4.4 pH and Temperature Effects on Proteins

pH and temperature significantly impact protein structure and function. Extreme pH levels can denature proteins by disrupting hydrogen bonds and disulfide bridges, altering their tertiary and quaternary structures. Similarly, high temperatures can break weak bonds, leading to protein unfolding. POGIL activities explore these effects, emphasizing how changes in pH and temperature affect enzyme activity and protein stability. Understanding these concepts is critical for grasping protein behavior in various biological and experimental conditions, as discussed in AP Biology resources and practice materials.

Answer Key and Study Guide

The answer key and study guide provide essential support for mastering protein structure concepts. They offer clear explanations, correct answers, and tips for effective POGIL activity completion.

5.1 How to Use the POGIL Answer Key

The POGIL answer key is a valuable resource for AP Biology students to master protein structure concepts. Start by completing POGIL activities independently, then compare your answers with the key to identify areas for improvement. Use the key to understand common mistakes and learn from detailed explanations. Focus on understanding the reasoning behind each answer rather than just memorizing correct responses. Regularly review and apply the key’s insights to strengthen your grasp of protein structure and function. This approach ensures effective preparation for exams and deeper conceptual understanding.

5.2 Common Mistakes and Solutions

Students often confuse primary and quaternary structures, neglecting that quaternary involves multiple chains. Another mistake is overlooking the role of functional groups in tertiary structure. To avoid these errors, focus on understanding each level’s distinct characteristics. Practice identifying structures in diagrams and review POGIL activities. Additionally, ensure a strong grasp of peptide bonds and hydrogen bonding. Regularly reviewing the POGIL answer key can help catch and correct these common misunderstandings, improving overall comprehension of protein structure.

5.3 Tips for Effective Study

To excel in AP Biology, focus on active learning through POGIL activities, which promote critical thinking and collaboration. Regularly review protein structure diagrams and practice identifying each level. Use the answer key to verify understanding and address gaps. Incorporate flashcards for key terms like functional groups and peptide bonds. Dedicate time to analyzing how pH and temperature affect proteins. Lastly, utilize online resources for visualizing structures and reinforcing concepts. Consistent practice and thorough review are essential for mastering protein structure and function.

Detailed Analysis of Each Level of Protein Structure

Proteins’ functional efficiency relies on their four structural levels: primary (amino acid sequence), secondary (alpha-helices, beta-sheets), tertiary (3D folding), and quaternary (multiple chains). Each level ensures stability and specificity.

6.1 Primary Structure: Amino Acid Sequence

The primary structure of a protein is the specific sequence of amino acids linked by peptide bonds. This sequence determines the protein’s overall 3D structure and function. The order of amino acids is encoded by DNA, ensuring genetic continuity. Even a small change in the sequence can significantly alter the protein’s properties, leading to potential functional disruptions. Understanding the primary structure is foundational for analyzing higher-level structures and their roles in biological processes.

6.2 Secondary Structure: Alpha-Helices and Beta-Sheets

The secondary structure of proteins involves local arrangements of amino acids, primarily alpha-helices and beta-sheets. Alpha-helices are spiral structures stabilized by hydrogen bonds between amino and carboxyl groups of non-consecutive amino acids. Beta-sheets consist of flat, extended strands connected by hydrogen bonds between backbone atoms of adjacent strands. These structures are crucial for protein stability and function, contributing to the overall folding and interaction capabilities of the protein. They are often visualized in diagrams and models to help students understand their formation and significance in biological processes.

6.3 Tertiary Structure: Folding and Functional Groups

The tertiary structure represents the three-dimensional shape of a protein, formed by interactions such as hydrogen bonds, disulfide bridges, and hydrophobic interactions. Functional groups, like amino and carboxyl groups, play a critical role in these interactions, enabling the protein to fold into its native conformation. This structure is essential for the protein’s function, as it determines the active sites and binding capabilities. Enzymes and antibodies, for example, rely on their tertiary structure to perform specific biological tasks efficiently.

6.4 Quaternary Structure: Multiple Polypeptide Chains

The quaternary structure involves the assembly of multiple polypeptide chains, or subunits, into a single functional protein. These subunits are held together by non-covalent interactions, such as hydrogen bonds and ionic bonds, and sometimes disulfide bridges. This structure is crucial for proteins like hemoglobin, which consists of four subunits working together to transport oxygen. The quaternary structure enhances the protein’s stability and functionality, allowing for cooperative interactions and regulation of activity, which are vital for complex cellular processes.

Visual Aids and Diagrams

Visual aids like diagrams are essential for understanding protein structures. They simplify complex concepts, making abstract ideas tangible and easier to grasp, especially for visual learners.

7.1 Importance of Visual Learning

Visual learning is crucial for mastering protein structure in AP Biology. Diagrams and models simplify complex concepts, making abstract ideas tangible. They help students visualize alpha-helices, beta-sheets, and tertiary folding, enhancing comprehension. Visual aids also improve retention by engaging both visual and kinesthetic learners. Interactive diagrams in POGIL activities enable students to explore structural relationships dynamically. This approach fosters a deeper understanding of how functional groups and bonds contribute to protein function. By integrating visuals, students can better apply theoretical knowledge to real-world biological scenarios.

7.2 Diagrams of Protein Structures

Diagrams of protein structures are essential for visualizing the four levels: primary, secondary, tertiary, and quaternary. They illustrate amino acid sequences, alpha-helices, beta-sheets, and complex folds. Tools like ribbon diagrams highlight functional regions, while ball-and-stick models detail atomic interactions. These visuals aid in identifying functional groups, such as hydroxyl or amino groups, and their roles in bonding. Interactive diagrams complement POGIL activities, enabling students to explore and interpret structural hierarchies dynamically. Such resources enhance understanding of how structure relates to function in biological systems.

7.3 How to Interpret and Draw Protein Structures

Interpreting and drawing protein structures involves analyzing models like ball-and-stick or ribbon diagrams. Start by identifying the amino acid sequence and recognizing patterns like alpha-helices or beta-sheets. Use arrows or colors to highlight functional groups and bonds. When drawing, outline primary, secondary, and tertiary structures step-by-step. Label key features such as disulfide bonds or hydrophobic regions. Practice with templates or software tools to refine accuracy. POGIL activities often include exercises where students sketch and label structures, reinforcing their understanding of how amino acid sequences fold into functional proteins.

Common Questions and Answers

Common questions include understanding protein structure levels, effects of denaturing, and the role of functional groups. Answers clarify how structures fold and bonds stabilize proteins.

8.1 Frequently Asked Questions About Protein Structure

Students often ask about the four protein structure levels: primary, secondary, tertiary, and quaternary. They seek clarity on peptide bonds, hydrogen bonds, and disulfide bridges. Additionally, questions arise about how pH and temperature affect protein stability. Many wonder which structure remains after denaturation. Understanding functional groups and their roles is another common query. These questions highlight key concepts in protein structure and function, essential for mastering AP Biology.

8.2 Misconceptions About Protein Folding

One common misconception is that primary structure alone determines function, ignoring the role of secondary, tertiary, and quaternary structures. Some students believe that secondary structures like alpha-helices and beta-sheets form randomly, rather than being stabilized by hydrogen bonds. Another misconception is that tertiary structure is solely about aesthetics, not recognizing its critical role in enzyme activity and protein function. Additionally, some think denaturation completely destroys all levels of structure, but quaternary and primary structures often remain intact. Addressing these misunderstandings is key to mastering protein folding in AP Biology.

8.3 Clarifying Key Points from POGIL Activities

POGIL activities emphasize understanding the four levels of protein structure and their interdependence. They clarify that functional groups play a critical role in tertiary structure and enzyme activity. A common error addressed is confusing secondary and tertiary structures, highlighting that secondary structures are stabilized by hydrogen bonds, while tertiary structures involve additional interactions like disulfide bonds. POGIL also stresses that quaternary structure depends on multiple polypeptide chains. These activities ensure students grasp how environmental factors like pH and temperature affect protein stability and function, reinforcing key biological principles through collaborative, guided inquiry.

Resources for Further Study

Explore recommended textbooks, online platforms, and POGIL activities for in-depth protein structure analysis. Utilize visualization tools and practice PDFs to enhance understanding and retention of biological concepts.

9.1 Recommended Textbooks and Online Resources

For in-depth study, textbooks like Campbell Biology and Biology: The Core provide comprehensive coverage of protein structure. Online platforms such as Khan Academy and AP Biology YouTube channels offer video tutorials. Additionally, PhET Interactive Simulations and NCBI tools aid in visualizing protein structures. POGIL-specific PDFs, like the AP Biology Protein Structure POGIL Answer Key, are invaluable for guided practice. These resources collectively enhance understanding and retention of complex biological concepts.

9.2 Additional POGIL Activities for Practice

Beyond the core materials, supplementary POGIL activities focus on specific protein structure topics, such as amino acid sequences and 3D modeling. These exercises, available online, encourage collaborative learning and critical thinking. For instance, activities like “Modeling Tertiary Structure” or “Analyzing Functional Groups” deepen understanding. Many educators share additional POGIL worksheets on platforms like Teachers Pay Teachers or through AP Biology forums. These resources provide varied challenges, ensuring comprehensive mastery of protein structure concepts and their real-world applications.

9.3 Useful Websites for Visualizing Proteins

Several websites are invaluable for visualizing proteins, enhancing understanding of their structures. The RCSB PDB (Protein Data Bank) offers 3D models of proteins and interactive tools. Proteopedia provides annotated, interactive 3D structures, while PhET Interactive Simulations includes educational tools for exploring protein folding. Additionally, NCBI Structure and Visuell Science provide detailed visualizations and tutorials. These resources are essential for AP Biology students to grasp protein structure-function relationships and prepare for exams like the AP Biology test.

Mastery of protein structure is essential for understanding biological processes. POGIL activities effectively guide students through complex concepts, ensuring a deep grasp of protein function and its importance in biology.

10.1 Recap of Key Concepts

10.2 Final Tips for Mastering Protein Structure

  • Focus on understanding the four levels of protein structure and their interconnections.
  • Use visual aids like diagrams to visualize alpha-helices, beta-sheets, and polypeptide chains.
  • Practice with POGIL activities to reinforce concepts like functional groups and peptide bonds.
  • Review common mistakes, such as confusing hydrogen bonds with disulfide bonds.
  • Emphasize how pH and temperature affect protein stability and function.
  • Regularly review and self-test to solidify your understanding of protein folding and quaternary structures.